

This tutorial was written by Kelli on 02/13/09.
Do not copy this tutorial and post through any kind of group or claim it as your own. Resemblance to any other tutorial is strictly coincidental.
This tutorial was written using psp 12, but should work using any version.
It is written assuming you have a basic knowledge of PSP and its tools.
Supplies:
~ font of choice,
~Tube of choice,I am using the art of Keith Garvey
You can purchase this tube at MPT
~Scrap kit of choice or the one I used:
No N Between by Deziners Utopia and can be purchased here:http://sweetnsassydigiscrappers.com/store/index.php?main_page=product_info&cPath=1_141&products_id=1987
Check out thier blog here:http://dezinersutopia.blogspot.com/
Ok......Ready?
1. open a new image 500x500. Flood fill it white.
2.paste your tube as a new layer, resize it as needed, I used these settings: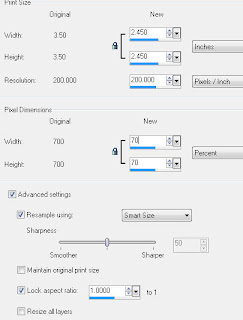
3.grab your Selection tool, you can use whatever shape you want, I chose star 2.Draw a large selection around your tube, paste a paper of choice below your tube layer,go to selections and invert the selection, make sure you paper layer is active, hit delete.
4.Invert the selection again and modify x 5 pixels.
Now go to effects~artistic Effects~Brush Strokes with these settings: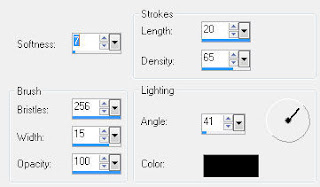
now you can deselect.go to effects~edge effects and enhance.
5.Duplicae the star layer, and resize it using these the same settings as before.
6.Duplicate the copy and resize the new duplicated layer.Merge all three star layers.Now duplicate the star layer again and rotate it to the right x 40 degrees Duplicate the rotated layer and rotate it again with the same settings,merge the star layers again.Duplicate it and on the original layer, go to effects~Artistic effects~Chrome with the default settngs.
7.On the Duplicated layer, resize it x 85%, and merge the star layers agian.Duplicate the star layer again and resize the duplicated layer x 85% again.
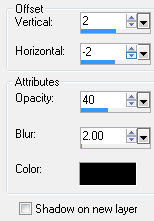
8.now give your bottom star layer and your tube layer this drop shadow:
 9.add elements of choice and give them each the above drop shadow or one of your choice.
10. add your Copywright and your watermark.
11. Add your name and any text effects you desire.Hide your bottom layer and save as a png your done.
Thanks for trying my tutorial!
Hugs,Kel


No comments:
Post a Comment