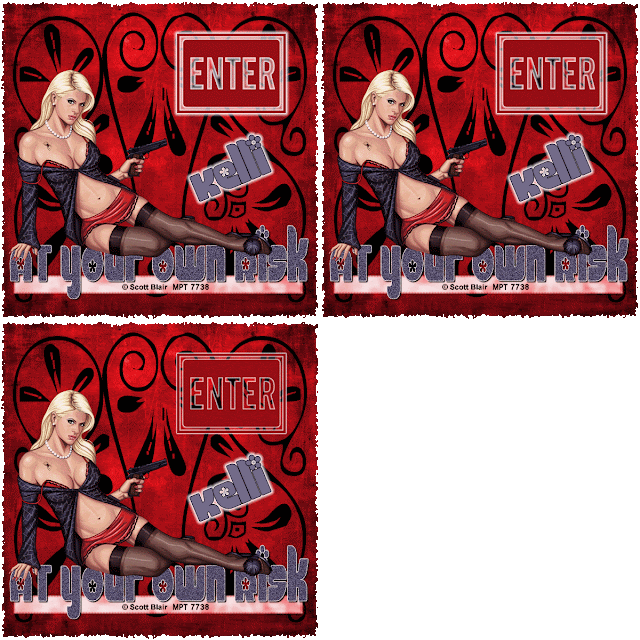
This tutorial was written by Kelli on 8/05/08.
Do not copy this tutorial or post through any kind of group or claim it as your own.
Resemblance to any other tutorial is strictly coincidental. This tutorial was written using psp 9, but should work using any version. It is written assuming you have a basic knowledge of PSP and its tools.
Supplies Needed:
~Eyecandy 4000-grad glow
~Tube of choice
~Fonts of choice
~The Scrapkit I used is called PURPLE FANTASY
By Angelina Designs.You May Purchase it here -http://sweetnsassydigiscrappers.com/store/index.php?main_page=product_info&cPath=1_26&products_id=152
Check out my blog here:
http://angelinadesigns.blogspot.com/
and an edge mask of choice.
Ok......Ready?
1. open a new canvas 600x600~ Transparent.
2.Open a paper and resizeit to 600x600.I colorized all the pieces of my tag
this is up to you,I just was in a mood to use red,My settings are:254,and 224
Copy and paste it as a new layer.
3.Go to layers,New mask layer and
Find your mask from the dropdown box.Click ok and merge group.
4.Open a doodle of choice,resize it and paste as a new layer,Grab your raster deform tool,and resize your doodle so it fitsnicely inside the paper.Merge the doodle and paper layer.
5.Paste your tube as a new layer,A tube that is laying down works nicely.
6.Choose the word art you are going to use.position it as desired.When happy with it,duplicate it twice so you have three layers.
7.On the first layer, go to effects eyecandy 4000,grad glow.My settings were:3,25,100.I used white,but you may use whatever color you like.
8. On the middle layer go again to eye candy and change the settings from 3 to 5.leave the other two settings and the color the same.
9.On the original layer go grad glow again and change the setting from 5 to 9.
10.Now grab your text tool,and type in your sayingI used the font Chick.Convert to raster layer.
11.Position the text as desired,when happy with the placement,duplicate it twice.
12.On the first layer to to adjust and add noise.settings as follows:amount of noise 33,Monocrome and uniform checked.
13.On the middle layer add noise as above but change the amount of noise to 36.
14.On the last text layer add noise changing the amount to 39.Now add a drop shadow to each of the text layers.
15.Add appropriate copywright now and your watermark if desired.
16.Add a ribon of choice,and place it under the text layers.Position it as desired.Add any other elements you desireAdd a drop shadow to them.
17. Add your name and any text effects as you desireI use a grad glow.
18.Now on to the animation,Hide the first 2 word art layers,and the first 2 text layers.Copy merged,Paste in animation shop as a new animation.
19.Back in psp,Hide the visible text and word art layers, and unhide the middle text and word art layers.Copy merged,Back in animation shop,Paste after current layer.
20.Now go back to psp and hide the middle layers,and unhide the first text and word art layers,copy merged and paste in animation shop after current layer.
21.View animation and save.
Thanks for trying my tutorial!
Hugs,Kel
















No comments:
Post a Comment