

This tutorial was written by Kelli on 07/08/09.
Do not copy this tutorial or post through any kind of group or claim it as your own.
Resemblance to any other tutorial is strictly coincidental.
This tutorial was written using psp 9, but should work using any version.
It is written assuming you have a basic knowledge of PSP and its tools.
Supplies:
~ font of choice
~4 Tubes of choice,I am using the art of Keith Garvey You must purchase a license to use his work you may get one at MPT
~Word art of choice or the one I used:

~A mask of choice or the one I used:
~Scrap kit of choice or the one I used:Purple Fantasy by Scrappy Kreations by Kel
and can be purchased here:
http://sweetnsassydigiscrappers.com/store/index.php?main_page=product_info&cPath=1_26&products_id=375main_page=index&cPath=1_167&sort=2a&page=1
Check out my blog here:
http://angelinadesigns.blogspot.com/
~And template #12 by Simone. I cant provide you with the template but I can link you to her site.
you can download it here:
http://www.sophisticatsimonepsptutorials.com/Templates/SimoneTemplates9.html
Ok......Ready?
1.Open The template and shift D to duplicate it.Close the original.Delete the top layer, the one with the copywright info.
2.Add a new raster layer, and fill it with a paper, or a color to match your tube.Load the mask
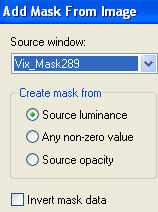
and merge group.Use your deform tool to stretch the mask to the edges of your canvas but be sure not to cut off any of the edges of the mask.
3.Make the frames layer the active layer. With your magic wand click inside the first frame, you will have to click more than onceto select all of it. Expand the selection x 2. Paste one of the papers invert selection and hit delete on the keyboard.
4.Select none.Repeat on the rest of the frames.
5.paste your tubes as new layers. repeat the above steps to put the faces inside the frames.
6.Merge down the hanging ropes with the frames, colorize themmy settings were:Hue 19 and sat 126.
7.Add a black border 2 pixels, add a white border also 2 pixels. Add another border 10 pixels and make a light color to match youe tag.Add another white border 2 pixels and another black border 2 pixels.
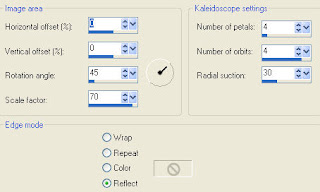
8.grab your magic wand and click inside the colored border, go to effects, reflection effects and apply kaleidoscope:
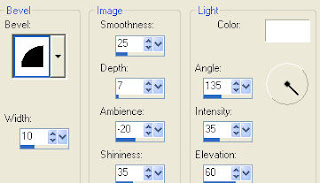
Keep it selected and add an inner bevel:
 9.Keep it slected and add noise:
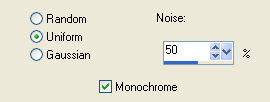
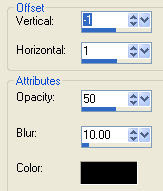
10. Repeat the inner bevel. Add this drop shadow:
11.Select none.Resize your tag, mke sure all layers is checked
I resized mine so rhe width was 500 pixels.
12. Add the Copywright and Watermark, Type your name and apply the same drop shadow as before.
13. Save it as a jpeg.
Thanks for trying my tutorial!
Hugs,Kel


No comments:
Post a Comment