

This tutorial was written by Kelli on 07/07/09.
Do not copy this tutorial and post through any kind of group or claim it as your own. Resemblance to any other tutorial is strictly coincidental.
This tutorial was written using psp 9, but should work using any version.
It is written assuming you have a basic knowledge of PSP and its tools.
Supplies Needed:
~Tube of choice I used A poser by Sly, isnt she cute?!?!?!?!!!
~Font of choice
~Mura Miester-copies
~A doodle and a flower (opyional) from a scrap kit
~And a mask of choice.I used this one:
Ok......Ready?
1. Open a new image 500x500 ~transparent.Flood fill it with a dark color of choice.
2.Load your msk and merge group.
3.Paste your doodle, resize it as desired, Duplicate, mirror and flip it.
4.Paste your flower,as a new layer on top of your doodle, or use your preset shapes tool to draw a shape, instead of using a flower.Duplicate it, mirror and flip it, position the doodles and shapes as desired.
5.Grab your preset shapes toolset to rectangle, f/g white, b/g set to black, stroke width set at 2.Draw a large square in the middle of your canvas.Duplicate it and resize it by 85%. Position it in the middle of Grab your magic wand and cick inside the smaller rectangle, expand you selection x 1 and fill it with a color to match your tag. Select none, merge down.Rotate it to te right
by 20 degrees.
6.Draw another rectangle(This will be the bottom rectangle.)repeat the steps above.
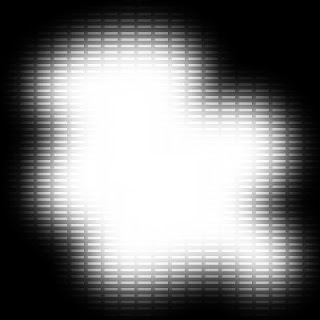
7.grab your magic wand and selec the inside color of one of your rectangles and apply a texture effect of your choice. I applied blinds with these settings:

8.Repeat the texture effect on the other rectangle.
9.Type "Lil' Angel. b/g black, f/g null. apply it, position it in the bottom rectangle, duplicate it and position it beside the first text layer, refer to my tag.
10.Convert those layers to raster and merge them down when you are happy with the placement of them.
11.Now type "I'm a lil' angel" very small and go to Mura Miester-copies and apply the line setting.
then go back to the same filter only use these settings:
12.Make the large rectangle your active lyer,grab your magic wand and click outside of the rectangle. ow make the tiled layer the activr layer,
Hit delete on your keyboard to get rid of the words that are outside the rectangle.
13.Paste your tube and add a drop shadow of choice.Here are my settings: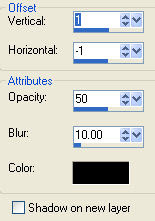
14.Add your Copywright info and watermark now.
15.Type your name, in a scripty font. b/g black, f/g null. Convert to raster.Add a white grad glow,
and then the same drop shadow from before.
16.Resize all layers by 75%
17. If you added a white background delete it before saving it as a png.
Thanks for trying my tutorial!
Hugs from Kel


No comments:
Post a Comment