
 This tutorial was written by Kelli on 02/12/09.
 Do not copy this tutorial and post through any kind of group or claim it as your own. Resemblance to any other tutorial is strictly coincidental.
This tutorial was written using psp 12, but should work using any version. It is written assuming you have a basic knowledge of PSP and its tools.
Supplies:~ font of choice
~Tube of choice I used art by Elias Chatzoudis
You can purchase this tube at MPT
~mask:~ Scrap kit of choice or the one I used:
Scrap kit of choice or the one I used:Be Mine by Stacey’s Designs and can be purchased here:http://sweetnsassydigiscrappers.com/store/index.php?main_page=product_info&cPath=1_83&products_id=1638
Check out her blog here:http://staceysdesigns.blogspot.com/
Ok......Ready?
1. open the mask, and minimize it for now.
2.Depending on how many hearts you want(I did 4).Open the papers you want...I chose 2 pink and 2 red.go to layers~new mask layer~from image, and load the heart mask or one of your choice,once its loaded merge group and repeat this step on the rest of your chosen papers.
3.Copy and paste these hearts onto a new image (700x700 White).Add this drop shadow to each mask layer after pasting it on the new image: 
4.Resize each of the mask layers,(I did them x 75% twice).Then rotate each one x 20 degrees.then play around with the positioning of them.
5.Open the pink and red heart frames, resize them like you did the mask layers.Paste them as a new layer and position them as desired,Add this drop shadow: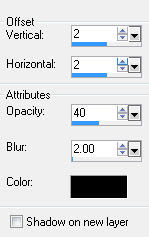
6.resize and paste the elements of choice, adding the above drop shadow to them, Add your tube and the same drop shadow.
7.Add your © and watermark.
8.Type your name and add the effects you desire.
9.Hide the background layer and save it as a png and your done!
Thanks for trying my tutorial!
Hugs,Kel


No comments:
Post a Comment