
This tutorial was written by Kelli on 06/06/09.
Do not copy this tutorial and post through any kind of group or claim it as your own. Resemblance to any other tutorial is strictly coincidental.
This tutorial was written using psp 9, but should work using any version.
It is written assuming you have a basic knowledge of PSP and its tools.
Supplies:
~ font of choice
~Tube of choice,I am using the art of Joel Adams
You can purchase this tube at CILM
~Scrap kit of choice or the one I used:
Have grape wil travel by Sassy's Imagination and can be purchased here:http://sweetnsassydigiscrappers.com/store/index.php?main_page=product_info&cPath=1_74&products_id=3163
Check out her blog here:http://sassysimagination.blogspot.com/
~And a round mask of choice or the one I used: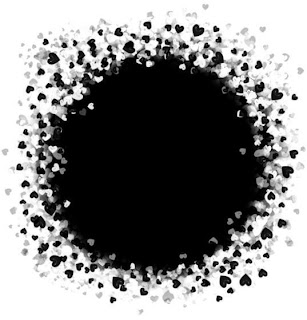
Ok......Ready?
1. open a new image 500x500. Flood fill it white.
2.Add a new raster layer and fill it with a color to match your tube or paste one of the papers as a new layer
3.Load your mask making sure to check the invert box.Merge group and then resize the mask layer X75%
4.Duplicate the mask layer twice, go to your plugins and choose Eye Candy 5 the brushed metal filter with the vinyl record effect, using these settings:
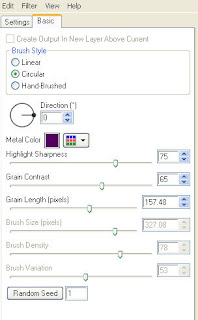 apply to the first mask layer.
Apply the effect to the other mask layers only hit random seed once each time.
5.Paste your tube as a new layer and resize it as desiredAdd a drop shadow of choice.
6.Add the elements of choice, resize and osition as desired.I added noise to a few of the flowers.
7.To add noise, Duplicate the layer twice, so you have 3 layers.Make the first layer activeUse your magic wand or selection tool to select the part you would like to add noise to.go to adjust, add noise with these settings or play around with settings of your choice:
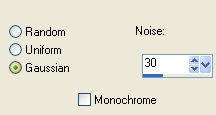
8.use the same settngs on the other 2 layers, only increase the amount X 3 on each layer.Or use the setings of your choice.9.Grab your text tool and the font you have chosen, and type "Sassy one". Convert it to raster layer, apply any text effects you like I used an inner bevel and a drop shadow. Position it as desired.Then type"Stylish &". Convert it to a raster layer and apply the same text effects. position it as desired, I rotated X90 degrees, to the right.Next type "Chic" and again convert it to taster and apply the same text effects and position it as desired.
10. add your Copywright and your watermark.
11. Now its time to animate, Hide the top two mssk layers and also the top two noise layers.and Copy merged then paste it into animation shop. Go back to psp and hide the first mask layer, unhide the middle mask layer, also hide the first noise layer and unhide he middle noise layer, copy merged and go bsck to animation shop and paste it after current layer. Go back to animation shop and hide he middlle layers, and unhide the third layers, copy merged and and go back to animation shop and paste it after current frame.
12.Still in animation Shop go to edit and select all, now go to animatiion and change the frame properties to 20.
View animation and save.
Thanks for trying my tutorial!
Hugs,Kel


No comments:
Post a Comment