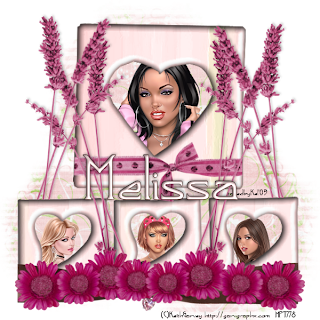
This tutorial was written by Kelli on 07/21/09.
Do not copy this tutorial or post through any kind of group or claim it as your own.
Resemblance to any other tutorial is strictly coincidental.
This tutorial was written using psp 9, but should work using any version.
It is written assuming you have a basic knowledge of PSP and its tools.
Supplies:
~ font of choice
~4 Tubes of choice,I am using the art of Keith Garvey You must purchase a license to use his work you may get one at MPT
~A mask of choice (Around one works best)
~Scrap kit of choice or the one I used:Beau-Ti-Ful Beau by Creative Intuitionz
and can be purchased here:
http://sweetnsassydigiscrappers.com/store/index.php?main_page=product_info&cPath=1_113&products_id=3407
Check out her blog here:
http://creativeintuitionz.blogspot.com/
Ok......Ready?
1.Open a paper of choice, copy it.Close the original.Open a new image,
500x500 pixels, select all and edit paste into selection.Select none.
2.Load your mask, and merge group.
Resize the mask by 85%.
3.Open your tubes of choice, I used the ones with the heart cutouts.
Use your eraser tool to erase the ribbons at the top and in the middle of the frames.
Position them as desired. Merge them together, select all, floa and defloat, now
open another paper, resize it to 350x350 pixels, go to effects and apply brush strokes
with the default settings. Copy it, go back to your tag, and paste into selection. Add a drop shadow of choice.
4.Select none, Activate your mask layer, Duplicate it and play around with the mask layers until you are happy with the efects, (I wanted mine to show through the frames)
5.Open your tubes and resize them so they will show nicely inside your frames.
Copy and paste them as new layers behind the frame layer.Use the selection tool, set to rectangle, draw a selection around the heart cutout in your first frame, invert selection. Make our tube layer actie and hit delete on your keyboard.
Repeat with the other tubes.Merge all four tubes nd add a drop shadow.
6.Open the two ribbons you are gona use, resize them and position as desired, use your selection tool or eraser tool to et rid of the ribbons that are outsie of the frames(check out my tag for reference.
7.Now open your elements resize them and paste them onto your tag, position them as desired, add a drop shadow to each.
8.Add your copywright and watermark.
9.Add your name along with any text effects you desire.I added an inner bevel nd a drop sadow.
10. save it as a png
Thanks for trying my tutorial!
Hugs,Kel
















No comments:
Post a Comment