
 This tutorial was written by Kelli on 01/10/09.
 Do not copy this tutorial and post through any kind of group or claim it as your own.
Resemblance to any other tutorial is strictly coincidental.
This tutorial was written using psp 9, but should work using any version.
It is written assuming you have a basic knowledge of PSP and its tools.
Supplies:
I used Eyecandy 4000 grad glow
~ fat Font of choice, I used Fatso
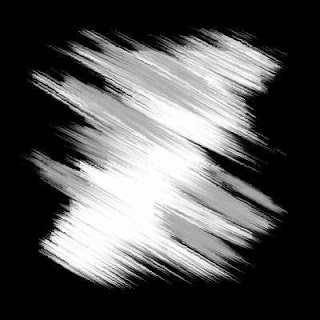
~Mask that I used
(If this is yours please let me know and I will give you credit or take it down):
~Tube of choice,I am using art by OliviaYou can purchase this tube at CILM
~Scrap kit of choice or the one I used:
by Sinful Jades Creations it is called:Sweet heart and can be purchased here: http://sweetnsassydigiscrappers.com/store/index.php?main_page=product_info&cPath=1_130&products_id=1617
You can check out her Blog here:
Ok......Ready?
1. Open a new image 600x600 White.
2.Grab your text tool and find your chosen font I used one
called Fatso. Line width set to 5. F/g color a dark color of choice and the background null.Type your name. Convert to raster.
3.Click inside each letter, modify expand x 3 and paste a paper of choice as a new layer.invert selections and make sure your paper layer is the active layer and hit delete on your key board to get rid of all the excess paper.
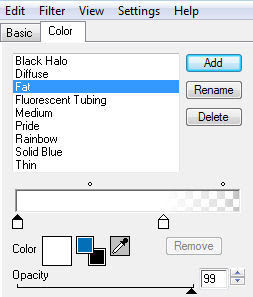
4.Now make your name outline the active layer and duplicate it,Drag the duplicated layer below the paper layer.On the top layer (name outline) apply eyecandy 4000 grad. glow with these settings
The color tab:
 and the basic tab:
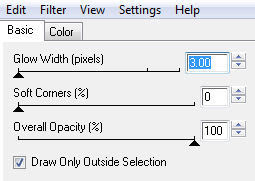 5.Now give the layer this drop shadow:
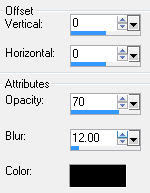
6.Now we will work on the duplicated name layer,go to eyecandy impact and choose the extrude filter with these settings: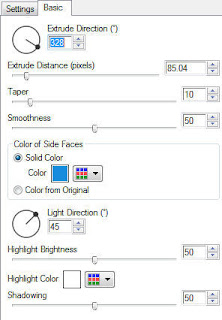
7.you can use a texture effect on this layer if desired.I used penta color dot with these settings: 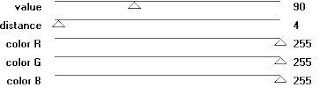
8.Now go back to the top name outline, click on, only the outline with your magic wand
Once all the letters outilines are seleted go to effectes, texture effects and choose a texture of your choic,I used these settings: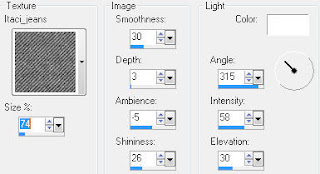 Repeat this step and then go to edge effects and enhanceSelect none.
Repeat this step and then go to edge effects and enhanceSelect none.9.Add your tube and © and watermark.I applied this drop shadow
to the tube and the elements in my tag: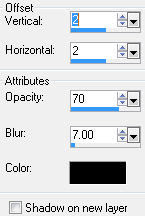
10. make the bottom white layer the active layer and paste your paper layer again as a new layer.Apply your mask and merge group.
11. Apply the elements of choice, and the same drop shadow as used in step 9 or your choice of shadow12.
Hide the bottom white layer and save as a png.
Thanks for trying my tutorial!
Hugs,Kel


No comments:
Post a Comment