
 This tutorial was written by Kelli on 9/05/08. Do not copy this tutorial or post it through any kind of group or claim it as your own. Resemblance to any other tutorial is strictly coincidental.
 This tutorial was written using psp 9, but should work using any version.
It is written assuming you have a basic knowledge of PSP and its tools.
Supplies needed:
~I used Eye Candy 3 But this is optional
~A mask and word art of choice
~Font of choice
~Tube of choice,If you chose to put a tube with it I just used the beautiful fairy from her kit
~And the scrap kit by Babzy's Boutique Called Shades of BrownYou can purchase it here:
http://sweetnsassydigiscrappers.com/store/index.php?main_page=product_info&cPath=1_135&products_id=1675
You can visit her blog here:
Ok......Ready?
1. Open supplies in pspMinimize them for now.Open a new canvas 500x500~ White.
2.Add a new layer,and flood fill it black or a color of choice.Load your mask .Merge group.Grab your selection tool,Set to Rectangle.Draw a selection over the entire middle Rectangle.Go to effects, 3-D effects, Cutout with these settings:and leave selected.3.Add a new raster layer.Drag it beneath the group layer.Paste a paper of choice into selection.Now you can deselect.
4.Ok grab your selection tool again.Still set to rectangle,Draw a small rectangle over one of the little rectangles. 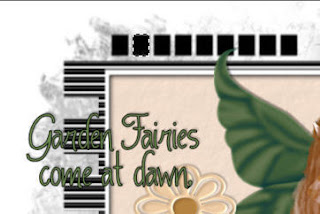 5.Add a new raster layer and fill your selectionwith a color that will match the kit or your tube.I choose green because its the designers favorite color.and I love that color also.
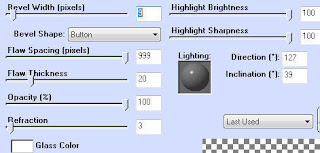
5.Add a new raster layer and fill your selectionwith a color that will match the kit or your tube.I choose green because its the designers favorite color.and I love that color also.6.Deselect,Convert your colored rectangle to a raster layer,this is up to you...But here are the effects I used on my little rectangles:
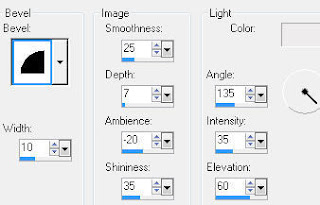
And then:
 7.Now you will duplicate these lil boxes till you have all the lil black ones covered. I found it easier to duplicate and then move that way i could remember which one I had duplicated,lol.
8.Find the box you are gonna start your blinkie with and move it right above the mask layer,rename it 1.
And continue to do this so thatyou have them all in order and renamed.(Trust me....Its so much easier when it comes time to animate)
9.Paste your tube as a new layer,and give it a drop shadow.Here is the one I used:
-2,2,40,2
10.Add your © and watermark.Add the elements of your choice,and the word art.I used this drop shadow for all my elements and the word art.
Are you happy with the way your tag looks?
If so....Lets animate!
11.First thing we are gonna do is hide all but 2 lil boxes.I hid all but #'s 9 and 18(this will depend on how you want your blinkie to run)
Now copy merged and paste into animation shop as a new animation.
12.Hide those 2 layers and unhide #'s 8 and 17.Copy merged and paste into animation shop after current frame.
13. Continue the previous step till you have come to the end of the lines.This is the numbers I had together:7 and 166 and 155 and 144 and 133 and 122 and 111 and 10
14.Now you should have 9 frames in animation shop.So go to edit and select all,then go to animation and animation propertiesand change the animation speed to one that you are happy with mine is 20.
15.Shift+D to duplicate the animation.Go to edit and select all.Go to animation and reverse frames.Copy and then Propogate paste.Then go back to the original animation and click on your last frame.Then paste after current frame.
View animation and you are done!
Thanks for trying my tutorial!
Hugs,Kel


No comments:
Post a Comment