
This tutorial was written by Kelli on 4/10/08.
Do not copy this tutorial or it post through any kind of group or claim it as your own. Resemblance to any other tutorial is strictly coincidental.
Do not copy this tutorial or it post through any kind of group or claim it as your own. Resemblance to any other tutorial is strictly coincidental.
For this tutorial you will need a
~font of your choice.
~Tube of choice.I am using art work byKeith Garvey you can purchase a licnse to use his tubes
at MPT.
~two masks and the
~two masks and the
~font called 52 pick up
Ready to get started?
Open your tube and fonts.
Put the masks into the mask folder in your psp files.
1) Open a new canvas 500x500, White.
2) Add a new Raster layer and flood fill itwith a color from your tube.
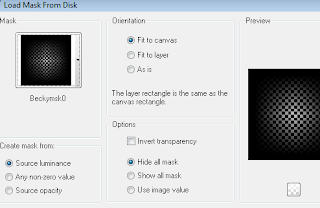
3)Go to layers~Load/Save maskfrom disc,Find your first mask I used one called BeckyMsk0.Load with these settings:
Merge group layer.
4)Add another layer,Flood fill it with color of choice.Again go to load save mask and find your second mask I used BeckyMsk16
Load with the same settings as above and merge group.
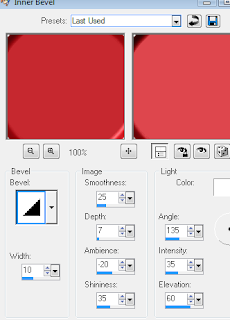
5)Now go to effects,inner bevel with these settings:
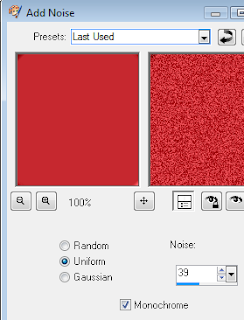
6)Then go to adjust,and add noise with these settings:
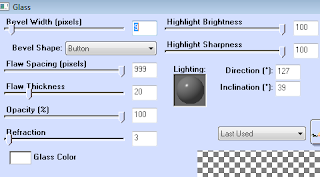
7)Now go to effects,eyecandy 3~Glass with these settings:
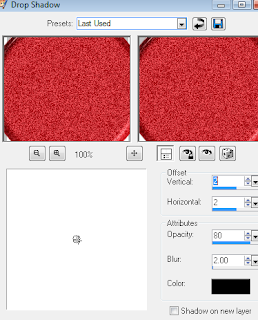
8 ) Now go to effects and add a drop shadowwith these settings:
9)Copy and paste your tube as a new layer and resize it as desired.Add the dropshadow of choice. Add your copywright at this time.
10) Choose the font 52 pick up size set at 90 stroke width set at 1 foreground color black and background color one from your tube.I typed in D, but you can choose your own favorite pick up line....LOL. Add drop shadow of choice.
11)Choose another font.Foreground black, Stroke width 3,background null.Type your text. Convert to rastor and applythe same inner bevel as before.
12)With your magic wand click inside of each of the letters of your name.Go to selections~modify~expand by 2.
13)Add a new raster layer.Move it below the name layer.Fill the selection with a color of choice.
14)Duplicate the fill layer twice.Make the first fill layer the active layer.Go to effects andDBS Flux~Bright noiseSet at 50. hit mix once.
15)On the second fill layer goDBS Flux~Bright noiseAnd use the same settings and hit mix twice.Repeat for the third fill layer.Only hit mix three times.
16)Again on the first fill layer go to effectsand VM NATURAL ~ Sparkle with these settings:
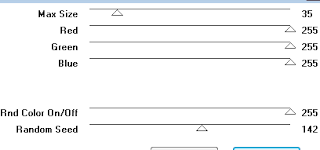
17) On the second fill layer use the same settings only changing the random seed to 135.On the third one change the random seed to 140. Now Go to adjust,Sharpen Sharpen each fill layer.
18)Add a drop shadow of choice to your name layer.
19)Hide the bottom two fill layers.Copy merged and paste it into animation shopas a new animation.
20)Go back to psp and hide the first fill layer and unhide the second fill layer.Copy merged and paste into animation shop after current frame.
21)Go back to psp and hide the second fill layer and unhide the third fill layer.Copy merged and paste into animation shop after current frame.
22)Now view your animation and your done!
Thanks for trying my tutorial!
Hugs,Kel


No comments:
Post a Comment