Wednesday, June 5, 2013

Summer Breeze


This tutorial was written on 06/05/2013, By Kelli.
Please don't copy it or claim it as your own or post it through any group.
You may link back to my blog.
Any resemblance to any other tutorial is strictly coincidental.
It is written assuming you have a basic knowledge of psp and its tools.
It is written using psp X5 but should work in any other version.

You will need a tube of choice.I am using Sweet Summer Breeze,by Zlata_M.
You must have a liscence to use her tubes.
You can purchase the tube and license here
You will need the scrap kit by Redefined Designs
Called Summer Breeze.
You can purchase it here
You can check out her blog Here
Ok Ready?
1.Open the life preserver image from the elements folder,shift + d to duplicate and close the original.
Resize it by 65%, all layers unchecked.
Add a drop shadow with these settings:
3,-3,30,5,black.
2.Open a a paper pf choice. Shift +D to duplicate then close the original.
Resize it to 500x500 pixels.Copy it.
3.Back on the life preserver image...click inside it, with the magic wand. you may 
have to click inside it a few times to get all of the inside selected. Then go to selctions,
modify expand by 5.
4.Now add a new raster layer and drag it below the life preserver layer.Paste the paper into the selection. 
Select none.
5.Open the water image, Resize it by 65%.Copy and paste it as a new layer.Drag it to the bottom layer. 
 Resize it again, if desired.Sharpen and add a drop shadow if desired. I used the same drop shadow throughout.
 Duplicate it and position the layers to however you like them.Merge all the water layers together
6.Repeat above step with the sand image..
7.Now repeat with the cloud layer.
Duplicate it as many times as you like and then merge all the cloud layers together.
8. Add a new layer and arrange it to the bottom of your canvas. Now go to image, resize canvas and make your canvas bigger.I made mine 750 x 750 pixels.Don't worry we will crop out the excess canvas, but this way we wont be cutting off any of the elements were adding.
9.Open the umbrella.Copy and paste it as a new layer. Resize it  by 65%. Then again by 85%.
Add a drop shadow and position it as desired.
10.Open one of the signs.Copy and paste it as a new layer.
Resize and add the same drop shadow.
11.Add more elements now if you would like.
Be sure to resize them and add the drop shadow. Sharpen if needed.
12.Copy and paste the grass as a new layer. Resize it as desired and add the drop shadow. 
Duplicate it and position the layers at the bases of the umbrella and the sign.
13.Open your tube. copy and paste it. Resize it to a good size. 
Sharpen it and add your drop shadow now.
Now Place it in front of the life preserver.
14.Duplicate the life preserver and sandwich the tube in the middle of the preserver layers.
15. Use your eraser tool and erase the part of the top preserver layer so that her face is showing.
Do the same thing to the tube layer so that none of it peeks from the bottom of the preservers.
(You can also do this with only one "frame layer"
And your selection tool. But It looked like my tube layer had been cut in two. So I opted for the eraser tool instead)
16. Add your © now.
and your water mark if desired.
17. Now is the time to arrange the tag as you would like. Duplicate the layers you would like more of
resize some of them. 
After its arranged to please you merge visible.
18. select all selections float and then defloat.
Go to image and crop to selection.
Then resize the image to the size you like.
18. Add  your name in your choice of fonts. I used Oogie Boogie.
You can download it here.
And now your done!

Thanks for trying my tutorial!
I hope ur happy with your results!
Hugs from Kelli

Sunday, September 19, 2010

Have I told you?


This tutorial was written on 9/19/2010.By Kelli.
Please dont copy it or claim it as your own or post it through any group.
You may link back to my blog.
Any resemblance to any other tutorial is strictly coincidental.
It is written assueming you have a basic knowledge of psp and its tools.
It is written useing psp9 but should work in any other version.
You will need the mask I have provided here
Or one of your choice.
You will need a tube of choice.I am using Jamie Kidd.
You must ave a liscence to use her tubes.
You can purchase one here
You will need the scrap kit by Psp Girl
Called Love and Passion.
You can purchase it here
She has 2 blogs you can check them out here and here
Ok Ready?
1.Open the mask in psp and minimize it.
Open a paper of choice shift d to duplicate and close the original.
Copy
2.Open a new image 500 pixels by 500 pixels.
3.Paste the paper as a new layer.
4.Load the mask and merge group.
5.Open the frame(Element 51)Resize it to 500 pixels tall and then resize it again this time by 85%.Copy and paste it as a new layer.Position it and add a drop shadow of choice.
6.Paste your tube as a new layer below your tube layer.Position her and grab your selection tool.Draw a slection around her face and make sure to get all her hair.
7.Promote the selection to layer and select none.Move the promoted layer above the frame layer
and on the tube layer add your shadow.
Now you will need to take your eraser tool
to the originak tube layer.Carefully erase the part of the tube below the frame.
8.Open element 56 shift d to duplicate it and close the original.
Copy and paste it as a new layer.Resize it till you are happy with the size.When you are happy position it
and add your shadow.
9.Open one of the arrows.CCopy and paste it as a new layer.
Resize and position it as desired.When you are pleased with the placement.Tske your selection tool and select the bottom half ot the arrow.Promote selection to layer.Go back to the arrow layer and hit delete on your keyboard.Now drag the promoted layer below the heart laywer so it looks like the arrow is going through the heart.
10.Add more elements now if you would like.
11.Add your text. in your choice of font or fonts.
I typed "Have I told you lately I love you?"
I used two fonts.When your happy with it add your favorite text effects.
12.Add ©Now.
And add your name to the heart along with your favorite text effects.
I used an inner bevel and drop shadow.
13.Save it as a png and your done!
Thanks for trying my tutorial!
I hope ur happy with your results!
Hugs from Kelli

I Love you this much!

This tutorial was written by Kelli on 09/19/2010.
Please do not copy post it through any kind of group or
claim it as your own.You may link back to my blog.
It is written useing psp 9 but should work in any version.
It is written assueming you have a basic knowledge of psp
and its tools.
Any resemblance to any other tutorial is strictly coincidental.
You will need 5 tubes of choice.I am useing
the art work of Suzanne Woolcott.You must purchase a
license to use her work.You can purchase the tubes and license here
Please do not use her work if you do not have a license.
You will also need the scrap kit by
Designs by Marcie called "Down by the pond"
You can purchase it here
Please check out her blog Here
I used 2 fonts also
I used Copperplate Gothic Bold and a scripty font called Cherish.
ou will also need Eye Candy 4000 Gradient glow (Optional)
My screen shots are here for you to refer to.
Ok Ready?
1.Open the Mat racket and shift+D to duplicate.Close the original.Resize it by 25% once and then to 600 pixels by 600 pixels.Both times make sure all layers is checked.Now resize it again, this time uncheck all layers and resize it by 75%.
2. Go to image-free rotate- and rotate it to the right by 25.
3.Add a gradient glow useing the settings shown in ss1,and 2.If you dont have eye candy just use a drop shadow with the color white.
4.Now add a drop shadow of choice or the ones shown in ss3.
5.Open the frame window.Shift + D to duplicate and close the original.
Resize it by 35% and then again by 45%.
6.Rotate it to the left by 18.Copy and paste it onto your tag image above the mat layer.
7.Open 4 papers of choice and shift + d to duplicate each and close the originals.Resize each paper to 500 pixels.
8.Go back to your tag ans grab your magic wand and click inside one of the squares.Expand the selection by 5.
9.Add a new layer and drag it brnrsth your frame layer.Copy one of the papers and paste it into selection.Repeat this step until all four squares are filled with a paper.
10.Repeat step 9 with 4 of your tubes.First resize them as desired before you paste them.And invert the selection and hit delete on your keyboard.
11.Add the same drop shadow to each tube.
12.Once each square is filled with a paper and tube, select none and add the same drop shadow to the frame layer.Hide all layers except your frame and the paper layers and tube layers and merge visible.
13.Duplicate the merged layer twice and arrange them as desired.
Refer to my tag for placement if needed.
14.Position the mat and frame layer as desired.
15.Open the star doodle and shift + d to duplicate. and close the original.
Resize it by 25% once.Copy and paste it as a new layer. between the mat and frame.
16.Use the same gradient glow and drop shadow as before.
17.Open three flowers of chice and shift + d to duplicate each
close the originals.Resize each flower as desired.I started by resizeing them each by 25%. And then copied and pasted them as new layers on top of the frame layer.And then continued resizeing them till i was happy with them.
make each flower a different size..
18.Position each of the three flowers in the bottom left corner of the
frame.give each one a drop shadow.and position them as desired.
19.Duplicate each flower and position them in the top right corner of the mat.Resize each one by 85%.When your happy with the clusters merge down each flower into the two clusters to make it easier to move them.
20.Now open one of the frames and shift + d to duplicate and close the original.Resize it as desired.Copy and paste it on top of your frame layer.
21.Add the gradient glow and drop shadow as before.
22.Open another tube, resize it as desired.Copy and paste it as a new layer. Add the same gradient glow and shadow.Position the tube as desired.
23.Add your © now.
24.Grab your text tool and type your text.
I typed "I love you this much!"I used two fonts for it.
Get creative!I used a gradient glow on the word "Love"
And when I had the text like I wanted it I add the same gradient glow twice.
25.Useing a font of choice type your name and resize it so it fits inside your tag.Ise the same grad glow and a shadow of choice or just use
your favorite text effects.
26.Merge visible.Select all,selections float,selections defloat.
Now go to image and crop to selection to get rid of the canvas around your tag.
27.Save as a png and your done!
Thanks for trying my tutorial!
I hope your happy with the results!
Hugs from Kel

Saturday, September 11, 2010

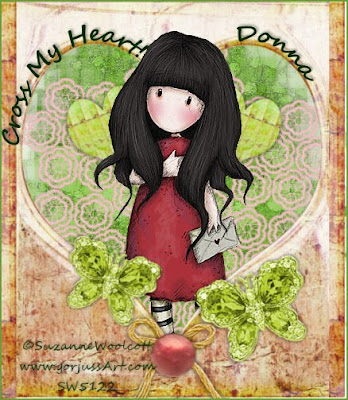
Cross my heart!

This tutorial was written by Kel on 09/11/2010.
Please do not copy it, post it through any group or claim it as your own.You may link back to my blog.
Any resemblance to any other tutorial is strictly coincidental.
It is written useing psp 9 but should work in any version.
It is written assueming you have a basic knowledge of psp and its tools.
You will need a mask of choice,I used one that comes in psp called
Edge squares.
You will also need a tube.
I am useing a tube by Suzanne Woolcott
you must have a license to use her tubes
you cam purchase one here
You will also need the scrap kit by Jessicas sweet nothings
called Spring Fling which can be purchased here
Check out her blog here
Ok Ready?
1.Open the doily, Shift +D to duplicate. Close the original.
Resize it to 500 pixels high and make sure all layers are checked.
Resize the doily by 85% make sure to uncheck resize all layers.
3.Colorize the doily to a color from your tube.
(an easy way to colorize is to go to adjust-hue and saturation-colorize.
When chosing the color you want to use.Click on your foreground color in the materials pallette on the side.With the materials pallette still open at the bottom you will see 2 columns of numbers.Write down the first two numbers in the second column of numbers. The H and S.Then when you go to colorize just insert those colors into the appropriate boxes click ok and your doily is colorized.)
4.Open a paper of choice and resize it to 900 pixels.I colorized the paper also.Copy it and paste as a new layer onto your image.
Drag it to the bottom.
5.Go to layers-Load save mask from Disc and load your mask.
Merge group and add a drop shadow.
6.Open the heart frame and resize it to 500 pixels high.
7.Copy and paste above the doily layer.
8.Grab your crop tool and crop around the frame layer.You dont want to crop off very much of your frame layer but you dont want any canvas showing around your frame.
9.Open the heart and resize it y 35% once.Copy and paste it below the frame layer.
10.Resize it by 75% three or four times till you are happy with the size.
11.Now rotate it tot he left by 20 degrees.Move it up and over a bit.
Add a drop shadow and duplicate it.
Now mirror the duplicate and position both hearts.
12.Copy and paste your tube as a new layer under the frame layer.
13.With your freehand selection tool draw a selection around her head and right click the tube layer in the layer pallette and promote selection to layer.go back to the tube layer and hit delete on the keyboaard
Select none and moce the promoted selection above the frame layer.
14.Now add the elements of your choice.
I added the button,rope bow and the greeen butterfly.I resized each of them by 35%.And added a drop shadow after they were pasted.
When your happy with the placement of everything add a small border
2 pixels in a color to match your tube.
15.Add your © now.
16.Now grab your presets shape tool set to elipse.
Make your foreground a color and the back ground null.
Draw an oval and use the nodes to shape it like one side of the heart.
Now grab your text tool and move your cursor over the elipse until you see an A with a half circle under it.When you see that you can left click your mouse and start typing.Your text will follow the curve of the circle now.Type "Cross my Heart!"
17.When your happy with the placement of the text go to layer pallette and click on the + on the vector layer.You will see two more layers now.
Click on the eye beside the elipse layer so the circle will not be visible.
Covert to raster now and add your drop shadow.
18.Repeat steps 16 and 17 again for your name.
19.Save as a jpeg.
Thanks for trying my tutorial.
I hope your happy with the results!
Hugs from Kelli

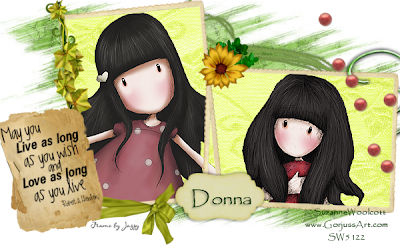
Live


This tutorial was written by Kel on 09/11/2010.
Please do not copy it, post it through any group or claim it as your own.
You may link back to my blog.
Any resemblance to any other tut is strictly coincidental.
It was written useing psp 9 but should work in any other version.
It is written assueming you have a basic knowledge of psp and its tools.
Supplies needed:
My zip file here
included in it is the frame I used
and the mask.
Im very sorry I dont know where I got these.
If you do please email me at purplehearts@live.com
and I will give credit or take them down
You will also need one or two tubes, I am using tubes by
Suzanne Woolcott, You can purchase her tubes here
You must have a license number to use her tubes.
You will also need the scrap kit by Jessica's Sweet Nothings
called "Spring Fling",
you may purchase it here
check out her blog here
Ok Ready?
1.Open the frame from my Supplies.Shift+D to duplicate it and
close the original.
2.Resize the frame to 600 pixels wide.Make sure you have
resize all layers checked.
3.Grab your magic wand and click inside all three openings of the frame.
Go to selections and modify and expand x 5 pixels.
4.Add a new layer and move it beelow the frame tube
5.Open a paper from the kit and resize it to 900x900 pixels.
Copy and paste it into selection on the new layer you made.
Select none.
6.Now open another paper and resize it also.
7.Paste it as a new layer onto your tag.Drag it to the bottom.
8.Open the mask I supplied and with the new paper layer the
active layer go to layers-new mask layer-from image.
8.Merge group and duplicate it.Position the two mask layers as desired.
9.Open the 2 tubes you have chosen.Resize them if needed and paste them as new layers.Drag them below the frame layer and position them as desired.
10.Grab your eraser tool and erase the parts of the tubes that are outside of the frame.
11.Open the tag from the kit and resize it x 35%.Copy and paste it as a new layer and move it to the top.Add a drop shadow to it.
12.You may need to resize it again.
13.Now open the button and resize it x 35% twice.Copy and paste it as a new layer and resize it again if desired.Add the same drop shadow to it.
14.When your happy with the size duplicate it several times and position them as desired.
15.Open the twine and resize it x 35%.Copy and paste it as a new layer and drag it below the frame layer and the paper layer below the frame layer.Position the twine so only a small amount of it shows above the frame layer.
16.I also added the leaf garland resized x 35% and positioned so that it looks like its part of the sunflower.
17.Open the heart doodle and resize it x 35%.Copy and paste it under the frame paper layer.
18.Lower the opacity of the frame and frame paper layer so you can see the heart doodle under it.
19.With your freehand selection tool and carefully draw a selection around one of the doodles (Refer to my tag).When you have drawn your selection go to your layer pallette and left click on the doodle layer and promote selection to layer.Now still on the doodle layer hit delete on your keyboard.Select none.Increase te opacity back to 100.
20.On the promoted selection layer drag it above the frame layer.
21.Add your © at this time.
22.Add your name to the tag and add the same drop shadow as before.
23.Save as a png.
Thanks for trying my tut!I hope your happy with the results!
Hugs from Kel

Wednesday, September 8, 2010

Believe


This Tutorial was written by Kel
on Sept.08,2010.
Please do not copy it or post ot through any group.
Or claim it as your own.
You may link back to my blog.
Any resemblance to any other tutorial is strictly coincidental.
This tutorial was written using PSP9
But should work in other versions also.
It is written assueming you have
a basic knowledge of PSP and its tools.
Supplies needed:
My zip file here
It includes my Word art,
The mask I used(I dont know where I got this mask
If you know please email me at purplehearts@live.com
so that I can give proper credit or take it down)
and the font I used called Angel tears
you can find it here
You will also need one or two tubes.
I am using tubes by Patty Ann
You can find them here
Her tou is on the site,Please adhere to her tou.The tubes in this forum
are free to use and its so nice of her to share.Thanks Pat!
You will need a scrap kit of choice.
I used "The Land of Shroom"
By S.G. Rowe designs
You may purchase it here
You can check out her blog here
Plug ins you will need are: Muras Meisters copies
and Eye Candy 4000 HSB Noise.
Ok now were ready to start
1.Open a new image 600x600 transparent.
2.Open a bow of choice, If your useing the same kit as me I used bow 03.
Resize it x 35% twice and sharpen it once.Copy and paste it as a new layer.
3.Go to effects Muras Meister copies use the settings shown on screen shot #1.
4.Now go back to effects and apply eye candy 4000 HSB noise with settings shown in screen shot #2.
5.Open a tag of choice i used tag 02.Resize it x 35% once and then again x 75%once and then sharpen it once.Copy and paste it as a new layer on top of the bow layer.I fliped it, also.Position it as desired.
6.Open a string or curly ribbon of choice.I used Glitter string 04. Resize it x 35% twice and sharpen it once.Copy and paste it below the tag layer, duplicate it and mirror it position as desired and duplicate again.
7.Open the three mushroomsResize them each x 35% once and then resize them again x 75%. Copy and paste them as new layers on top of the bow layer.Resize and position them till you are happy with them.Then duplicate e4ach and mirror and position them as desired.
8.Open paper of choice. I used paper01.Resize it x 35% and copy it
go back to your image and add a new layer drag it to the bottom.Select all and paste the paper into selection.Open your mask ans load it with the setttings in screen shot #3.
9.Add another layer and drag it to the bottom.Open another paper of choice I used paper 38.Resize it X 35% and back on your tag select all and paste into selection.Select none.
10.Grab your freehand selection tool and draw around the circle on the bow layer,(Screen shot 4) activate the mask layer and hit delete on your keyboard.
11.Now activate the bow layer and grab your preset shapes tool set to circle.Background null and foreground set to black.Line width set to1.
12.Add a drop shadow to each layer,I used the settings shown in screen shot #5.
13.Add a new layer and move it to the top.Select all and fill it with a color of choice.Go to selections and modify contract the selection by 5.Hit dekete on your keyboard.
14.Open both tubes.Paste one below the bow layer so the face is showing through the circle in the bow layer.Set the blend mode to luminance(l)
Use your eraser tool to erase all the tube thats outside the bow layer.
15.Activate the top layer and paste the second tube as a new layer.Add the same drop shadow as before.Position as desired.
16.Add copywright.Add my word art or one of your choice.
17.Open the font and type your name.Rotate it (Screen shot #6)
Repeat the rotate.Depending on the size of the name you may have to use the deform tool.Position the name on the rectangle tag or wherever you would like.Add any text effects you desire.
Save as a JPEG.Thanks for trying my tut
I hope your happy with the results!
Hugs from Kel

Friday, July 23, 2010

The task ahead


This tutorial was written by Kelli on 07/23/2010.

Please do not copy this tutorial, post it through any kind of group or claim it as your own.Resemblance to any other tutorial is strictly coincidental.

This tutorial was written using psp 9 but should work in any other version.It is written assueming you have a basic knowledge of psp and its tools.


Supplies Needed:

My zip file Here

It includes the mask i used, if you know who created this mask please let me know so I can give proper credit.

It also includes the tube I used by ©P.Ann

If you use this tube please follow her tou which is also included in the zip

and if you like this tube check out the forum here

Escape From Reality is a wonderful group of friends.Thier is something there for everyone! It is a great for pspers and non pspers.If you apply to join tell them Kelli sent you and enjoy looking around.

It also includes my word art but of course you can use your own.


You will also need a font of choice.I used Fashion Victim which you can download here.

You will also need a scrapkit of choice.

I used A scrap kit by Ms.WitchyPoo designs called, Forever Mini

You can purchase it here.

Check out her blog here.


Ok Ready?


1. Open a new image 500x500.Flood fill it White or a color of choice.


2.Add a new layer.Open a paper of choice,Resize it to 500x500 pixels paste as a new layer, or flood fill the layer with another color of choice.


3. Load the mask I have provided or one of your choice.Make sure invert mask is unchecked.Merge group.Move it up and to the left a little.


4.Open the red frame and resize it x 35% twice.Paste it as a new layer.Sharpen it once.


5.Grab your magic wand and click inside the frame, expand the selection x 6.Add a new layer below the frame layer.


6.open another paper and paste as a new layer selections invert, and hit delete on your keyboard, select none.


7.Add a new layer above the mask layer, select all.Now open element 14(its the white splotches)Copy it and go back to your tag, Paste into selection, Add a drop shadow of your choice, my settings are -2,2,50,5,black.Duplicate this layer mirror it and flip it.Position it as desired.


8.Add the same drop shadow to your frame layer.


9.Activate the frame layer and open thr pink rose the red rose, the leaf and a ribbon of choice.Resize all of these x 35% twice.


10,Paste each of the roses and resize them as desired.i resized them again x 85% until I was happpy with the sizes.Add the sane drop shadow to each.And duplicate the two roses until your happy with the arrangement.

I have 4 pink roses and 3 red roses.Paste the bow as a new layer and resize as desired add a dropshadow and position as desired.Paste the leaf below all the roses, add the drop shadow and resize as desired,position as desired.


11.Open the tube and resize it x 85% 4 times.Paste it as a new layer above everything.Add the shadow and position it in the bottom right corner.Add ©.


12.Add your text or use mine.I didnt addd any effects but feel free to if desired.


13.Add your name and any effects you desire.


14.Save as a jpeg.


Thanks for trying my tut!I hope your happy with your results!

Hugs from Kel