Thursday, July 22, 2010

Naughty or nice


This Tutorial was written by Kelli on 12/06/06 and last edited on 07/22/10.Do not copy it or post it through any group or claim it as your own.You may post a link back to my blog, and it would be greatly appreciated.Resemblance to any other tut is strictly coincidental.
This tutorial was written using psp 9 but should work using any other version.It is written assueming you have a basic knowledge of psp and its tools.
Please do not use any tues you do not have a license to use.Thank you.
Supplies needed:
These were all provided by P.Ann.I have included her tou in my zip file.
Please follow her tou.Thank you.
If you like her tubes please check out this forum, Escape from Reality,
Here you will find everthing you could want to psp. However you dont have to be a psper to join, and we have some of the best taggers on the net!There is something for everyone!
When you apply to join tell them Kelli sent you!
This file also includes the font I used
Ok ready to get started?
1. Open the frame.
2. Open one of the backgrounds provided, I chose background number 3.
Copy it and go back to your frame,Grab your magic wand and click inside all three frames, go to selections and expand x 3.Add a new layer and paste into selection.Deselect.
3. Open the tubes supplied or 2 of your choice.If your using the ones I supplied, you will need to resize them x 75%. Copy and paste them as new layers below your frame layer.When your happy with the placement merge them together.
4.Make the frame layer active, grab your magic wand agin and click inside the two end frames. Expand the selection x 3 click invert and activate the tube layer, hit delete on your keyboard.to get rid of the parts of the tube outside your frames.Noe activate your frame layer again and click inside the middle frame, activate your tube layer again and expand your selection again and hit delete again on your keyboard.Add a drop shadow to the frame layer and to the tube layer also.Merge these two layers.
5.Now add your © info.
6.Open the three christmas ornaments, resize them x 50% twice, copy and paste them above your frame layer,paste them as desired.
7.open the 2 bows and resize them x 50% once,copy and paste them as new layers and position them as desired, once happy with them, add a drop shadow to each of them and merge all the elements again, resize this layer once more this time x 85%.
8.Open the words supplied, these are the psd'd and each letter is on a separate lyer for you.If you would prefer to use a different font thats ok too.If using the lettters supplied, resize each by 85% and sharpen each.I also added a drop shadow to each letter.Paste them on top of the frame layer, and position them as desired, merge visible when happy with the placement.
9.Select all select float selections defloat, go to image and crop to selection.This will get rid of alll the excess canvas around your tag.
Save it as a png for use as needed.
10 Now just type your name.I have supplied a font but if you have one you like better thats ok too.
The size i used for my font is 60.Then I added the same drop shadow.
Save as a png.
Thanks for trying my tut!I would love to see your results!
I hope you are happpy with your results!
Hugs from Kel

Sunday, July 18, 2010

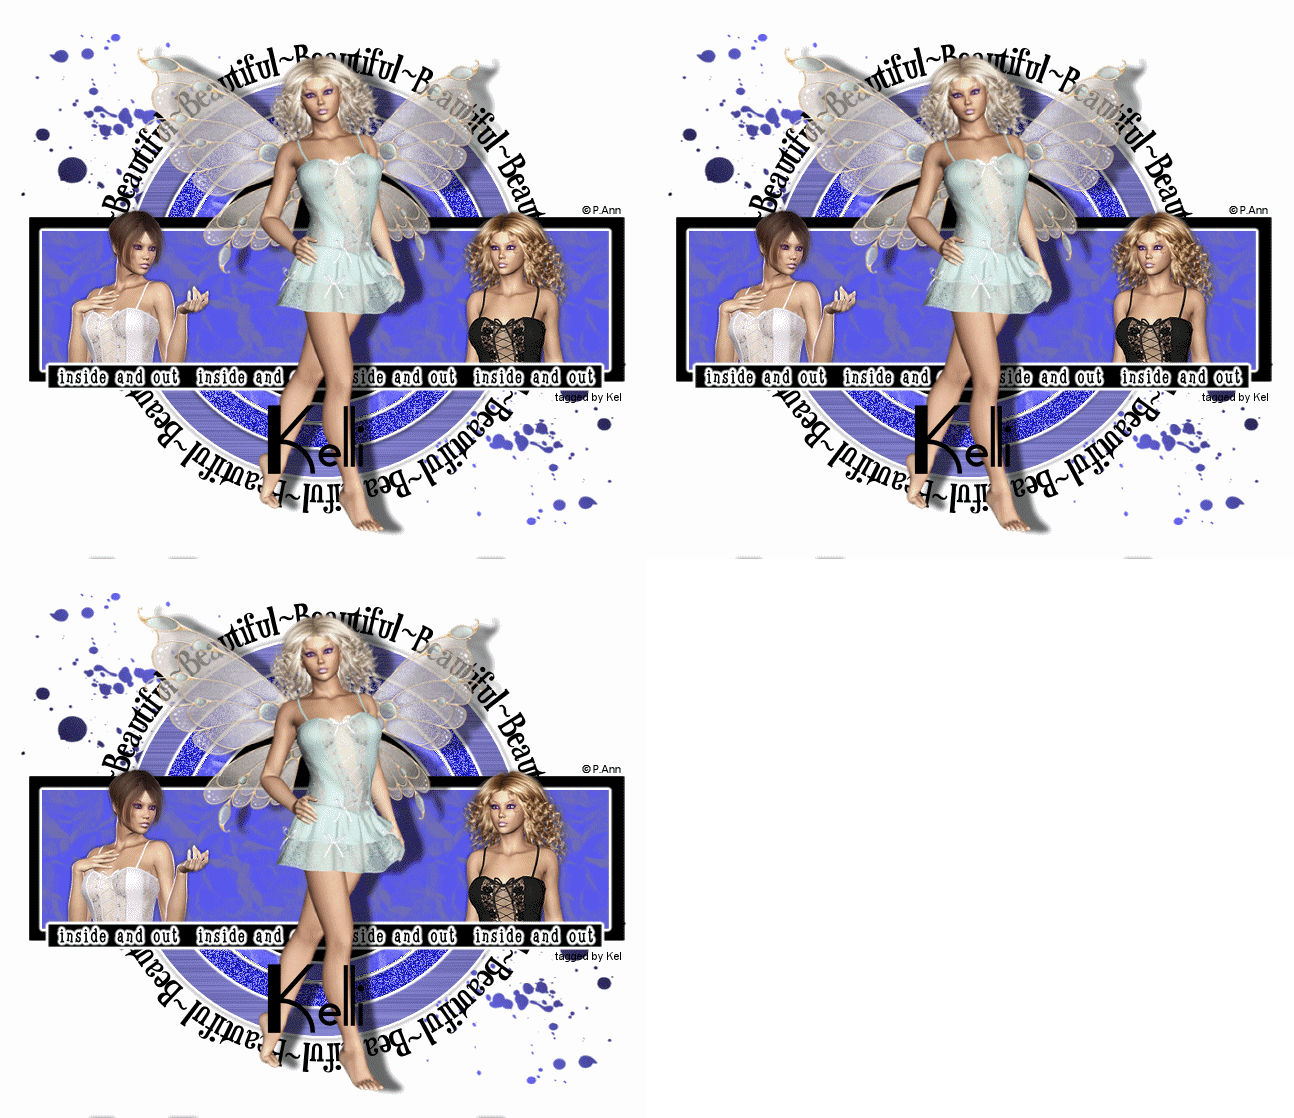
Beautiful:inside and out


This Tutorial was written by Kelli on july 18,2010.
Please do not copy this tut or post it in any kind of group or claim it as your own. You may link back to the blog.Any similarities to any other tutorial is strictly coincidental.This Tutorial was written using psp 9 but should workin any version.
It is written assuming you have a basic knowledge of psp and its tools.
Thanx!
I would live to thank Patty Ann for allowing me to use her tubes and for allowing me to include some in the supplies. If you use her beautiful tubes please follow her tou.And if you like her tubes please go here and check out the forum.
Thank you so much!

Supplies needed:
AlienSkin Eye Candy 5: Impact~Brushed Metal
Eye Candy 4000 Gradient Glow
my zip file here it includes my template and the tubes I used.You may use any tube you want but please dont use if you dont have a license number.It also includes all my screen shots I was having trouble posting them so i included them in the zip.I hope this doesnt cause anyone any trouble.
you will also need a font of choice I am using fashion victim
you can download it here

Ok Ready?

1.Open your font and minimize it. Open your supplies in psp.Open my template and delete my info layer.
2.Activate 1st circle layer.Duplicate it twice,rename them 1,2, and 3.Activate layer 1 and apply the brushed metal filter with the settings shown on ss1.Repeat this filter on the other 2 layers only hit the random seed button once each time.The color I used is 81802e.
3.Now activate layer 1 again and apply eye candy4000 gradient glowthe settings i used are shown on ss2.Repeat on the next 2 layers.
4.Activate layer 1 again and apply drop shadow with the settings shown on ss3.Repeat on the next 2 layers
5.Activate the 2nd circle layer.Go to selections and then select all then float then defloat.Flood fill it with your color of choice. I used 4040ff.Now duplicate it twice so you have three layers.Rename them 1,2,and 3 again. Activate layer 1 and go to adjust and add noise with the settings shown in ss4. On layer 2 change the setting to 97. and on the third layer change the setting to 94.Select none and add the sme grad glow and shadow as before.
6.Activate the 3rd circle layer.Go to selections,select all then float then defloat. Make your foreground your color of choice I used 5252ff And use whatever texture you would like. I used Crumpled tissue my settings are shown in ss5. Now fill your circle with the foreground color. then go to effects edge effects and enhance it once.Apply the grad glow and shadow as before.
7.Activate the center circle layer, the only thing i did on this layer was the grad glow and the drop shadow.
8.Activate the small rectangle. select all, float,defloat. Add a new layer and fill it with the color and texture you used before.Select none. Now go back to the small rectangle layer and add your grad glow and drop shadow as before.Merge these two layers.
9.Delete the top small rectangle layer and the top word layer.Merge the bottom small rectangle and word layers.Move them down just a bit.Refer to my finished tag if needed.
10. Activate the the large rectangle and flood fill it with a color of choice I used black.
11.Now activate the splotches make your foreground black and your background a color of choice I used 7070ff.Now make your background color a gradient see my screen shot ss6.Add a new raster layer just above the splotches and flood fill it with your gradient. Now go back to your splotches layer and select all float defloat again and now invert the selection and go back to your new layer and hit delete on your keyboard.
now go back to the splotches layer and delete it.
12.Add a new layer, flood fill it white and move it to the bottom.
13.Activate your top layer and paste your tube as a new layer,Resize it by 85% once.Add the same drop shadow only this time put the shadow pn a separate layer,ss7.
14.Now grab your deform tooland makeing sure the shadow layer is still activated,move the shadow over and down just a little bit.Now merge the tube and shadow layers.
15.Activate the small rectangle and paste tour other two tubes as new layers. Resize them both by 85% twice.Position them as desired. Wen your happy with them merge them and apply the same shadow as before but put the shadow on the same layer.Grab your selection tool and make a selection see ss8. Make sure your new tube layer is active and hit delete on your keyboard.
16.Now its time to add © and your watermark.
17. Add your name in your choice of fonts, i ued fashion victim.
18.Now its time to animate.Arrang your duplicated layers in order:112233.make the small circle layers are on top. now merge 1 and 1 together, 2 and 2 together and 3 and 3 together.Now your layer pallette should look like my ss9.
19.Turn off(click the eyebeside the layer)your name, and layers 2 and 3.make sure all other layers are active.copy merged and go to animation shop and paste as a new animation.
20. Go back to psp and close layer 1 and open layer 2 copy merged and go to animation shop and paste it after current frame.
21.Go back into psp and close layer 2 and open layer 3.copy merged and take it to animation shop and paste it after current frame.
22.View animation ans if your happy with it save it.Saving it without a name will allow you to add as many names to it later as you want.
23.to add names to it.Shift + D to duplicate it and close your original.
24.Now go back to psp and activate your name layer.Copy it and paste it in animation shop as a new animation.Copy it and then click propagate paste.
25.Go back to your tag and go to edit and select all frames now paste into selected frames.
26.view animation and save it.
Thanks for trying my tut! I hope your happy with your results!Id love to see them.Email me at purplehearts@live.com with your results!
Hugs from Kel

Wednesday, January 6, 2010

Easy Signature tag


This tutorial was written by Kelli on 01/06/10.
Do not copy this tutorial or post through any kind of group or claim it as your own.Resemblance to any other tutorial is strictly coincidental.This tutorial was written using psp12, but should work using any version.It is written assuming you have a basic knowledge of PSP and its tools.


Supplies Needed:

~ The Scrap kit By Designs by Brandi
Called Honeybunch
it Can be purchased HERE
Its a fantastic kit! One of my favorites!
Here is a zip of supplies if you want to download it.
DOWNLOAD
~font of choice I used Kingthings Slipperylip

you can download it HERE


Ok......Ready?


1.Open a new image about 600 pixels by 600 pixels,
transparent.
2.Open your font and minimize it.
Open your supplies in psp and resize them as needed.
Grab your font tool
and set your foreground to a paper of choice, and your background
as another background paper.
3. Type your name and use the nodes to make it as large as you desire.Depending on the size of your name or text
you may need to resize your canvas.
4.Go to selections, select all selections float, selections defloat,
selections modify contract x 2.
5.Now add an inner bevel or an eye candy glass.Select none.
6. Open the flower border and resize it x 35% Depending on the number of letters in your name you will need to either resize it bigger or smaller.
Paste it as a new layer and position it just below your name.
7.Now open one of the hearts. Resize it as before this time by 50% Copy and paste it as a new layer on top of your name layer.Position it right on top of your name.
Ok, So now we need to be able to see the name under the heart.So lower the opacity of the heart layer to about 50% so you can see the name layer but you can still see the heart also Now move the heart up so you can see your curly inside the hole in the heart.
10.Now grab your selecti0n tool.Now Make a selection with your free hand selection tool set to freehand, select the part of the name that you want to be threaded through the heart. Go to your layer pallette and right click on the name layer,promote the selection to layer,move the promoted selection to the top.Select none.
11.Now go back to your heart layer and increase the opacity back to 100%,Now you have threaded your name through your heart,Isnt that cool!
12.Now open one of the tags,Resize it as desired (I resized it by 50%)Now copy it as a new layer.Drag it below your name layer.Rotate tag to the left x 20 degrees. Now once the tag is where you want it you are gonna make it look like one of the curlies is hugging the tag.So like we did before,Lower the opacity of the tag so you can see both layers and make a selection like we did before.Promote the selection on the name layer again and right click the promoted selection and move it below the tag layer.Now go back to the name layer and hit delete on your keyboard to delete the part of the name you have selected.Change the opacity back to 100% and select none.
14.Merge visible.
15.Now go to selections and select all, then go back and select float and again go back and choose defloat Now go to image and crop to selection This will crop your tag and get rid of all the excess canvas.
16.Go to file and save as.Find where you want to save it and make sure to save it as a png.So that it will have a transparent background.And your done!
~Thanks for trying my tut!
Hugs from Kel

Sunday, December 6, 2009

Blue without you


This tutorial was written by Kelli on 12/06/09.
Do not copy this tutorial or post through
any kind of group or claim it as your own.
Resemblance to any other tutorial is strictly coincidental.
This tutorial was written using psp 9,
but should work using any version.
It is written assuming you have a basic knowledge of PSP and its tools.

Supplies Needed:
~ The Scrap kit By Green apple Scraps
Called Blue Christmas without you.
This kit is not for sale anymore,
However I have recieved permission to share it with you
so if you would like to download it you may do so HERE
If downloading please follow her tou and please leave a comment
I am sure she would love to read the comments.Its so generous of her to
provide this kit.
you can check out her blog HERE
~Tube of choice I used A tube by Patty Ann.
You can find it HERE.This is an awesome Forum.There is something for everyone there, When you apply to join tell them Kelli sent you
lol. If you are using her one of her tubes
Please follow her tou.Thanks!
~2 Fonts of choice
~The mask in my zip(If you know the creater of this mask
Please email me @purplehearts@live.com so that I can give credit. Thank you!
~The word art in my zip or one of your own
Supplies

Ok......Ready?
1. Open the a new image 600 x 600.Transparent.

2.Flood fill the layer with a color of your choice.I used #5089eo

3.Open a paper of choice or add a new layer and ff with a different color of choice.
4.Now go to layers and new mask layer from image
Load the mask I provided make sure invert mask is checked.Merge group.
5.Grab your selection tool set to rectangle,draw a rectangle selection in the middle of the mask layer.Refer to my tag if needed. Hit delete on your keyboard and select none.

6.Open wreath 2 Copy and paste it as a new layer below your mask layer.Resize as desired.I resized by 85%.
7.Add a drop Shadow of choice or my settings which are: V=-2,H=2,Opacity=50,Blur=5,Color Black.

8.Open another paper of choice, copy it and go back to your tag you are workng on. Grab your freehand selection tool and draw a circle on the wreath(doesnt have to be perfect) and make sure the new paper is active go to selections and invert selection and hit delete on your keyboard.
Now go to effects texture effects blinds and use your choice of setttings or here are my settings: width=7,opacity 50,color=black,horozontal checked.

9.Copy and paste the branch onto your tag just above the wreath.Add The same drop shadow you used before.Position the branch at the top of the wreath on top of the mask layer,
The branch will cover most of the bow on the wreath, see my finished tag as a reference.


10.Add your tube and copywright info now.I resized the tube x 85% twice.Add a drop shadow to the tube layer.

11.Open the christmas ornaments and resize as desired position it in her hand, use your eraser tool to erase part of the ribbon to make ot look like shes holding the ornament.

12.Now copy and paste my word art or one of your choice as a new layer. and add the shadow from before.Type your name and add the same shadow.Drag your name layer below the tube layer so it looks like her hand is resting on the name.
13.I resized my tag to 500x500 pixels.When your happy with your results,Save as a jpeg.

Thanks for trying my tut!
Id love to see your results! You can email me at purplehearts@live.com.
Hugs from Kel

Thursday, December 3, 2009

Whispers


This tutorial was written by Kelli on 12/03/09.
And last edited on 07/25/2010.
Do not copy this tutorial or post through any
kind of group or claim it as your own.
Resemblance to any other tutorial is strictly coincidental.
This tutorial was written using psp 9,
but should work using any version.
It is written assuming you have a basic knowledge of PSP and its tools.

Supplies Needed:
~ The Scrap kit By Ms. Witchypoo Designs
Called Forever Mini.
It Can be purchased HERE
you can check out her blog HERE
~My Supplies HERE
This zip includes the mask I used...
Sorry I do not know where I got this...
If its yours please contact me so I can give proper credit
or take it down.Thank you.It also includes the tube I used
By ©SLY
You can check out more of her work Here.
I have included her tou so please follow it if you use this tube.
Thanks Sly!
It also includes my Word Art.
~a Font of choice


Ok......Ready?

1. Open the a new image 500 x 500.Transparent.

2.Open the round frame andresize it to 500 pixels.
Copy and paste it as a new layer, resize it by 85%.Add a dop shadow of choice.My settings are 0,0,100,5,black.

3.Open the tube and resize it to 500 pixels(I always resize using smart size).Copy and paste it as a new layer, resize it again x 85%twice.You may want to harpen and add a drop shadow,
I did'nt add the shadow.

4.Now grab your freehand selection tool and select the lower half of your tube,You want it to look like she is laying inside the frame.Now go to the layer pallette and right click, promote selection to layer, Drag the promoted selection below your frame layer, Leave selected, go back to the tube layer and hit delete on your keyboard.Now you can deselect.
5.Add your copywright info now.
6.Open the mask you are using and load.If your usinf the one I provided...Make sure invert mask data isnt checked.
Merge group.

7.Now you are gonna add the elements,I have resized each to 500 pixels, copied them and then resized each starting out at 85% and repeating this resize until they were a size I liked
Sharpen each after resizing and add a drop shadow.
You can use my Word Art or if you would rather add different text
or you like another font better thats ok too.
8.Add your name in a font of choice.Add any text effects you like.

9.Merge visible, copy and paste as a new image,This will get rid of any excess canvas around your tag.
10.Save as a png.

Thanks for trying my tut!
I hope your happy with the results.
Hugs from Kel

Wednesday, December 2, 2009

Be Thankful

This tutorial was written by Kelli on 12/02/09.
Do not copy this tutorial or post through any
kind of group or claim it as your own.
Resemblance to any other tutorial is strictly coincidental.
This tutorial was written using psp 9,
but should work using any version.
It is written assuming you have a basic knowledge
of PSP and its tools.
Supplies Needed:
~ The Scrap kit By Honored Scraps called "Harvest Time"
I am not sure where it can be purchased now
And I cant find her blog now either.
If anyone knows where you can find her blog please let me know
so I can link the tut to it.
thanks!
~a Tube of choice.
I used a tube by Keith Garvey
you must purchase a license to use his work,
you can buy one at MPT
~a Font of choice
Ok......Ready?

1. Open a new canvas, 500 pixels wide x 500 tall.Color of choice,
I made it white.
2.Open the tube of choice.
3.Open the round flower frames. Resize them appropriately and copy and paste them as new layers.
Position them so one is on top of the other one, but so that you can see the bottom one peeking from under the top one.
Add a drop shadow of choice to both frames.
Make the bottom one active, grab your magic wand and click inside the bottom frame. Expand the selection by 2. Add a new layer.Copy and paste your tube into selection.Select none,Lower the opacity of the tube layer that is inside your frame.I set mine at 50%.Now paste the tube again on top of both frames.
4.Now just add the elements of your choice.I added a drop shadow to each element.When you are happy with the tag.Merge all.
5.Go to image and add a border.2 pixels color of your choice, add another border this time 10 pixels, color doesnt matter. Now add another border, color of choice.
6.Grab your magic wand tool and click inside the larger border.Open a paper of choice, copy and go back to your working image paste into seection. Select none.
7.Add a few more elements on to your tag now, add your
© info also.
8.Now add your name in your choice of fonts.Add your favorite text effects.
Save as a jpeg,
Thanks for trying my tut!
I hope you are happy with your results!
Hugs from Kel

Monday, November 30, 2009

Santa Baby

This tutorial was written by Kelli on 11/30/09.
Do not copy this tutorial or post through any kind of group or claim it as your own.
Resemblance to any other tutorial is strictly coincidental.
This tutorial was written using psp 9, but should work using any version. It is written assuming you have a basic knowledge of PSP and its tools.
Supplies Needed:
~ The Scrap kit By Staceys Designs
called "Christmas Time"
it Can be purchased
HERE
you can check out her blog
HERE
~a close up Tube of choice.I used a tube by Keith Garvey
you must purchase a license to use his work
you can buy one at MPT
~a Font of choice
Ok......Ready?

1. Open a new canvas, 500pixels wide x 300 tall.Transparent.
Selections Select all.Add a new layer.
2.Open a paper of choice, paste it into selection on the new layer.
3.Now open the single wrap frame,Copy it.Go back to your working image, add a new layer and paste into selection.Select none.
4.Open and resize the elements of choice, paste them and resize as needed.Add a drop shadow to each element.
5.Paste your tube as a new layer, below your frame layer,Position it as desired and add a drop shadow to it,Once you have it positioned as you like, grab your selection tool, freehand, and select the part of the tube you want to be outside of your frame. Once you have it selected, go to your layers pallette and promote selection to layer, drag the promoted layer above your frame.Now go back to the tube layer and hit delete on your keyboard.
6.Add your © info now.
8.Open the alphas that you are going to use.Resize them as needed, and paste them onto your tag.Add a drop shadow or grad glow to each letter.I have posted examples of both.
9.Grab your text tool and type your name, add text effects of choice.
Save as a jpeg,
Thanks for trying my tut!
I hope your happy with your results!
Hugs from Kel