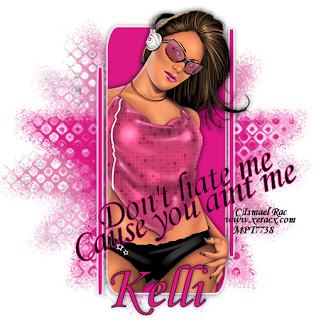
This tutorial was written by Kelli on 07/06/09.
Do not copy this tutorial and post through any kind of group or claim it as your own. Resemblance to any other tutorial is strictly coincidental.
This tutorial was written using psp 9, but should work using any version.
It is written assuming you have a basic knowledge of PSP and its tools.
Supplies Needed:~Tube of choice I used Ishmael Rac
You must purchase a license to use this tube. You
may purchase one at ami.
~Font of choice
~DBS Flux Bubbles (optional)
~And a mask of choice.I used this one:

Ok......Ready?
1. Open a new image 600x600 ~transparent.
Flood fill it with a dark color of choice.
2.Add a new Raster layer.Flood Fill it with the same color only a medium shade.
3.Add another one and fill it with a light shade of the same color.
4.Make the top layer the active layer.Load your mask, and merge group.
5 make the middle layer active, load the same mask,
Merge group and rotate it to the right 20 degrees.
6.Make the bottom layer active and load the mask again,
merge group. and this time rotate it by 45 degrees to the right.
7. Go back to the top mask layer, and select all, selections float then selections defloat, go to effects, DBSFlux Bubbles with the default settings.select none, repeat this on the other two mask layers. (If you ont have BS Flux, just use a texture you like)
8.With your preset shapes tool,set to rounded Rectangle.Your foreground color black,background null.Stroke width set at 2,draw a rectangle,a little smaller than the mask layers.Convert it to Raster,Grab your magic wand and click inside the rectangle, expand your selection by 1 pixel,
add a new raster layer, and drag it below your rectangle. Fill the selection on the new layer with a bright color.
9.With the preset shapes and the same settings as before. draw a long, skinny rectangle, position to the side of the big rectangle, duplicate it, mirror and flip the duplicate
position all three in the middle of the mask layers, (Refer to my tag)
10Add your tube, and a drop shdow, drag it under the large rectangle, use your selecction tool to select the part you want to delete, and hit delete on your keyboard, I also had to use the eraser tool to erase the corners.
11.Add your copywright and watermark now
12.Grab you text tool, and a scripty type font
and add your text along with your favorite effects.
Add your name i used the same font just reversed the colors.
13.If you added a white background delete it before saving it as png.
Thanks for trying my tutorial!
Hugs,Kel


Luv the new tut Kel... Hugs
ReplyDeleteTHANKS!!!!!!!!!!!!!!!!!
ReplyDelete