Sunday, December 6, 2009

Blue without you


This tutorial was written by Kelli on 12/06/09.
Do not copy this tutorial or post through
any kind of group or claim it as your own.
Resemblance to any other tutorial is strictly coincidental.
This tutorial was written using psp 9,
but should work using any version.
It is written assuming you have a basic knowledge of PSP and its tools.

Supplies Needed:
~ The Scrap kit By Green apple Scraps
Called Blue Christmas without you.
This kit is not for sale anymore,
However I have recieved permission to share it with you
so if you would like to download it you may do so HERE
If downloading please follow her tou and please leave a comment
I am sure she would love to read the comments.Its so generous of her to
provide this kit.
you can check out her blog HERE
~Tube of choice I used A tube by Patty Ann.
You can find it HERE.This is an awesome Forum.There is something for everyone there, When you apply to join tell them Kelli sent you
lol. If you are using her one of her tubes
Please follow her tou.Thanks!
~2 Fonts of choice
~The mask in my zip(If you know the creater of this mask
Please email me @purplehearts@live.com so that I can give credit. Thank you!
~The word art in my zip or one of your own
Supplies

Ok......Ready?
1. Open the a new image 600 x 600.Transparent.

2.Flood fill the layer with a color of your choice.I used #5089eo

3.Open a paper of choice or add a new layer and ff with a different color of choice.
4.Now go to layers and new mask layer from image
Load the mask I provided make sure invert mask is checked.Merge group.
5.Grab your selection tool set to rectangle,draw a rectangle selection in the middle of the mask layer.Refer to my tag if needed. Hit delete on your keyboard and select none.

6.Open wreath 2 Copy and paste it as a new layer below your mask layer.Resize as desired.I resized by 85%.
7.Add a drop Shadow of choice or my settings which are: V=-2,H=2,Opacity=50,Blur=5,Color Black.

8.Open another paper of choice, copy it and go back to your tag you are workng on. Grab your freehand selection tool and draw a circle on the wreath(doesnt have to be perfect) and make sure the new paper is active go to selections and invert selection and hit delete on your keyboard.
Now go to effects texture effects blinds and use your choice of setttings or here are my settings: width=7,opacity 50,color=black,horozontal checked.

9.Copy and paste the branch onto your tag just above the wreath.Add The same drop shadow you used before.Position the branch at the top of the wreath on top of the mask layer,
The branch will cover most of the bow on the wreath, see my finished tag as a reference.


10.Add your tube and copywright info now.I resized the tube x 85% twice.Add a drop shadow to the tube layer.

11.Open the christmas ornaments and resize as desired position it in her hand, use your eraser tool to erase part of the ribbon to make ot look like shes holding the ornament.

12.Now copy and paste my word art or one of your choice as a new layer. and add the shadow from before.Type your name and add the same shadow.Drag your name layer below the tube layer so it looks like her hand is resting on the name.
13.I resized my tag to 500x500 pixels.When your happy with your results,Save as a jpeg.

Thanks for trying my tut!
Id love to see your results! You can email me at purplehearts@live.com.
Hugs from Kel

Thursday, December 3, 2009

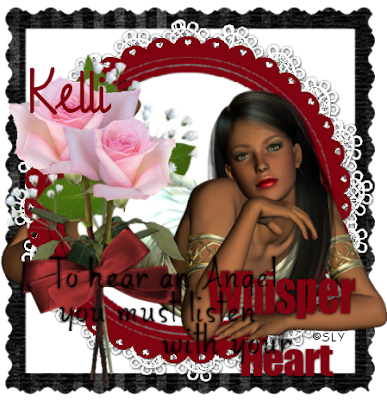
Whispers


This tutorial was written by Kelli on 12/03/09.
And last edited on 07/25/2010.
Do not copy this tutorial or post through any
kind of group or claim it as your own.
Resemblance to any other tutorial is strictly coincidental.
This tutorial was written using psp 9,
but should work using any version.
It is written assuming you have a basic knowledge of PSP and its tools.

Supplies Needed:
~ The Scrap kit By Ms. Witchypoo Designs
Called Forever Mini.
It Can be purchased HERE
you can check out her blog HERE
~My Supplies HERE
This zip includes the mask I used...
Sorry I do not know where I got this...
If its yours please contact me so I can give proper credit
or take it down.Thank you.It also includes the tube I used
By ©SLY
You can check out more of her work Here.
I have included her tou so please follow it if you use this tube.
Thanks Sly!
It also includes my Word Art.
~a Font of choice


Ok......Ready?

1. Open the a new image 500 x 500.Transparent.

2.Open the round frame andresize it to 500 pixels.
Copy and paste it as a new layer, resize it by 85%.Add a dop shadow of choice.My settings are 0,0,100,5,black.

3.Open the tube and resize it to 500 pixels(I always resize using smart size).Copy and paste it as a new layer, resize it again x 85%twice.You may want to harpen and add a drop shadow,
I did'nt add the shadow.

4.Now grab your freehand selection tool and select the lower half of your tube,You want it to look like she is laying inside the frame.Now go to the layer pallette and right click, promote selection to layer, Drag the promoted selection below your frame layer, Leave selected, go back to the tube layer and hit delete on your keyboard.Now you can deselect.
5.Add your copywright info now.
6.Open the mask you are using and load.If your usinf the one I provided...Make sure invert mask data isnt checked.
Merge group.

7.Now you are gonna add the elements,I have resized each to 500 pixels, copied them and then resized each starting out at 85% and repeating this resize until they were a size I liked
Sharpen each after resizing and add a drop shadow.
You can use my Word Art or if you would rather add different text
or you like another font better thats ok too.
8.Add your name in a font of choice.Add any text effects you like.

9.Merge visible, copy and paste as a new image,This will get rid of any excess canvas around your tag.
10.Save as a png.

Thanks for trying my tut!
I hope your happy with the results.
Hugs from Kel

Wednesday, December 2, 2009

Be Thankful

This tutorial was written by Kelli on 12/02/09.
Do not copy this tutorial or post through any
kind of group or claim it as your own.
Resemblance to any other tutorial is strictly coincidental.
This tutorial was written using psp 9,
but should work using any version.
It is written assuming you have a basic knowledge
of PSP and its tools.
Supplies Needed:
~ The Scrap kit By Honored Scraps called "Harvest Time"
I am not sure where it can be purchased now
And I cant find her blog now either.
If anyone knows where you can find her blog please let me know
so I can link the tut to it.
thanks!
~a Tube of choice.
I used a tube by Keith Garvey
you must purchase a license to use his work,
you can buy one at MPT
~a Font of choice
Ok......Ready?

1. Open a new canvas, 500 pixels wide x 500 tall.Color of choice,
I made it white.
2.Open the tube of choice.
3.Open the round flower frames. Resize them appropriately and copy and paste them as new layers.
Position them so one is on top of the other one, but so that you can see the bottom one peeking from under the top one.
Add a drop shadow of choice to both frames.
Make the bottom one active, grab your magic wand and click inside the bottom frame. Expand the selection by 2. Add a new layer.Copy and paste your tube into selection.Select none,Lower the opacity of the tube layer that is inside your frame.I set mine at 50%.Now paste the tube again on top of both frames.
4.Now just add the elements of your choice.I added a drop shadow to each element.When you are happy with the tag.Merge all.
5.Go to image and add a border.2 pixels color of your choice, add another border this time 10 pixels, color doesnt matter. Now add another border, color of choice.
6.Grab your magic wand tool and click inside the larger border.Open a paper of choice, copy and go back to your working image paste into seection. Select none.
7.Add a few more elements on to your tag now, add your
© info also.
8.Now add your name in your choice of fonts.Add your favorite text effects.
Save as a jpeg,
Thanks for trying my tut!
I hope you are happy with your results!
Hugs from Kel

Monday, November 30, 2009

Santa Baby

This tutorial was written by Kelli on 11/30/09.
Do not copy this tutorial or post through any kind of group or claim it as your own.
Resemblance to any other tutorial is strictly coincidental.
This tutorial was written using psp 9, but should work using any version. It is written assuming you have a basic knowledge of PSP and its tools.
Supplies Needed:
~ The Scrap kit By Staceys Designs
called "Christmas Time"
it Can be purchased
HERE
you can check out her blog
HERE
~a close up Tube of choice.I used a tube by Keith Garvey
you must purchase a license to use his work
you can buy one at MPT
~a Font of choice
Ok......Ready?

1. Open a new canvas, 500pixels wide x 300 tall.Transparent.
Selections Select all.Add a new layer.
2.Open a paper of choice, paste it into selection on the new layer.
3.Now open the single wrap frame,Copy it.Go back to your working image, add a new layer and paste into selection.Select none.
4.Open and resize the elements of choice, paste them and resize as needed.Add a drop shadow to each element.
5.Paste your tube as a new layer, below your frame layer,Position it as desired and add a drop shadow to it,Once you have it positioned as you like, grab your selection tool, freehand, and select the part of the tube you want to be outside of your frame. Once you have it selected, go to your layers pallette and promote selection to layer, drag the promoted layer above your frame.Now go back to the tube layer and hit delete on your keyboard.
6.Add your © info now.
8.Open the alphas that you are going to use.Resize them as needed, and paste them onto your tag.Add a drop shadow or grad glow to each letter.I have posted examples of both.
9.Grab your text tool and type your name, add text effects of choice.
Save as a jpeg,
Thanks for trying my tut!
I hope your happy with your results!
Hugs from Kel



Friday, November 20, 2009

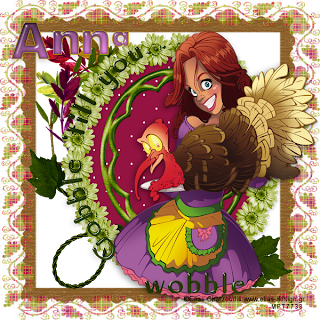
Gobble...


This tutorial was written by Kelli on 11/20/09.
Do not copy this tutorial or post through
any kind of group or claim it as your own.
Resemblance to any other tutorial is strictly coincidental.
This tutorial was written using psp 9,
but should work using any version.
It is written assuming you have a basic
knowledge of PSP and its tools.

Supplies Needed:

~ The Scrap kit By Mystical Designs
called "Thanksgiving Boquet"
Im sorry I dont know where it is being sold now.
So sorry that I dont have her blog link
if anyone nows it please leave it here so I can link the tut
Thanks!
~A tube of choice.I used a tube byElias Chatzoudis.
You need a license to use his work You can purchase one at MPT.
~Fonts of choice
~My supplies.
I dont know where I got these two masks.if they are yours please contact me at purplehearts@live.com
so that I may credit you or take them down

Ok......Ready?

1. Open a new image 600 x 600 pixels.
2.Open 2 of your papers,Copy one of them and paste it as a new layer
and copy and paste the other one on top of that one as a new layer.Load the frame mask on the bottom paper layer,merge group.
now load the grapevine mask on the second paper layer.
merge group.you may want to
resize one or both of the mask layers.
3.Now paste one of the circle frames as a new layer.
position it in the center and resize as needed.
Grab your magic wand and click inside the frame layer, you may have to click more than once to get it all selected,
modify the selection by expandng it x 5.
Add a new raser layer below the frame layer, open another paper and copy it, paste it into the selection on the new layer, select none.
4.Add some more elements from the kit, add a drop shadow to each.
5.Grab your elipse tool, background null, doesnt matter what color foreground is.draw a circle the size of the frame.
6.now grab your text tool and move your mouse over the elipse, till you get the symbol of an A with a line under it.When you see that you can start to type your saying. I typed "Gobble 'till you wobble",Just use your imagination to think of saying.A patient I used to take care of used to tell me that starting a week before thanksgiving,lol.
When you are happy with what you have typed,go to your layer pallette and click the + sign beside that layer, now hide the elipse.you should only see the text now.Convert it to a raster layer.
7.Add your name and any text effects you would like now.
8.Save it as a png.

Thanks for trying my tut!
I hope your happy with your results!
Hugs from Kel
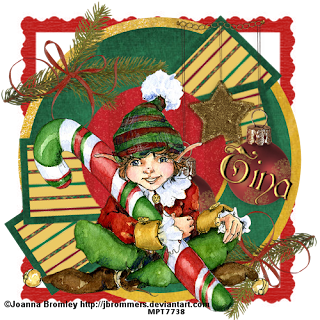
Elfin Magic


This tutorial was written by Kelli on 11/20/09.
Do not copy this tutorial or post through any kind of group
or claim it as your own.
Resemblance to any other tutorial is strictly coincidental.
This tutorial was written using psp 9,
but should work using any version.
It is written assuming you have a basic
knowledge of PSP and its tools.

Supplies Needed:

~ The Scrap kit By LadySaphira called "Past Christmas"
it Can be purchased HERE
you can check out her blog HERE
~A tube of choice.I used a tube by Joanna Bromley .
You need a license to use her work
You can purchase one at MPT,
This one was included in the awesome christmas gift this year.
~Font of choice
~A mask of choice

Ok......Ready?

1. Open a new image 600 x 600 pixels.
2.Grab your presets shape tool set to elipse.Stroke width set to 15.
Open 2 of your papers and set one for your foreground and one for your background.Draw out a large circle,to make it perfectly round, hold down the shift key while drawing it.Go to objects,align, center in canvas.Before converting to raster, pull on the nodes to make it the size you want it.Convert it to a raster layer.
3.Now draw a smaller one inside the large one you just made. This time, make the foreground null, and open a different paper to put in the background.objects align in center and when happy, convert it to a raster layer.
4.Now open 2 more papers, we are going to do the rectangle now.Put one paper in for your foreground and the other one in for your backgound.set your preset shapes to the square.Set the stroke width to 7 and draw out a square.When you are happy with the size, convert it to a raster layer.Use your deform tool to rotate it as desired.you will have to sharpen it also.Mabey several times.
5.Dupicate the square and flip it position it together with the first one.Merge down. when happy with the two squares.duplicate it again and mirror and flip.
6.Paste your tube as the top layer, resize and add a drop shadow of choice.Position it as desired, add ©info now.
7.Add the other elements you are planning on usng, add a drop shadow to each one.
8.now add a new layer and drag it to the botttom,open another paper and paste it as a new layer, load your mask of choice and merge group.
9.Add your name and any text effects you would like,I did an inner bevel and drop shadow .
10.Save it as a png.

Thanks for trying my tut!
I hope you are happy with your results!
Hugs from Kel

Saturday, November 14, 2009

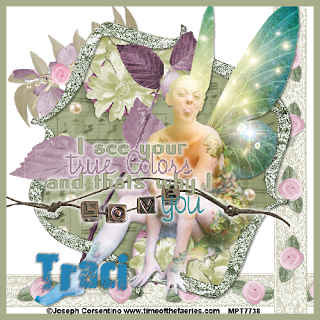
True Colors


This tutorial was written by Kelli on 11/14/09.
Do not copy this tutorial or post through any kind of group
or claim it as your own.
Resemblance to any other tutorial is strictly coincidental.
This tutorial was written using psp 9, but should work using any version. It is written assuming you have a basic knowledge of PSP and its tools.

Supplies Needed:
~ The Scrap kit By Horsedreamn Designs
called "Holding Hands"
it Can be purchased HERE
you can check out her blog HERE
~A tube of choice.I used a tube by
Joseph Corsentino . You need a license to use his work
You can purchase one at
MPT
~Fonts of choice

Ok......Ready?
1. Open a new image 500 x 500 pixels.

2.Open one of the glitter frames resize it to 900 pixels on the largest side then resize again this time by 50%, paste it onto your new canvas as a new layer.
3.Open a paper of choice, resize it to 900 pixels.copy and paste it onto your new canvas as a new layer,grab your magic wand and click inside the frame. Expand the selection by 3, invert selection, make paper layer the active layer and hit delete on the keyboard to get rid of the excess paper.

4.Open the beads tube, resize to 900 tall copy and paste it as a new layer right on top of the paper layer, position it as desired, duplicate it and mirror it position both layers as desired and merge them together.Activate one of the frame layers, grab your magic and tool and click outside the frame.Now activate the beads layer again and hit delete on the keyboard again to get rid of the beads that are outside of your frame.
5.Open the flower lace and resize it by 50% paste it as a new layer, drag it to the bottom of the layer pallete,now duplicate it and rotate the duplicate by 90 degrees to the left.Position it at the bottom.
6.Open the branch with beads, resize it by 50% twice, rotate it to the left by 20 and paste it as a new layer in the top left corner,or wherever you would like it.
7.Open flower 1, resize it by 50% twice. Copy and paste it as a new layer. Move it to the top so you can see what your doing to it.Add a drop shadow of choice my settings are 2,-2,38, 3.Resize it again, this time by 75%Duplicate and resize the duplicate by 85% position it as desired to make your flower cluster, now duplicate and resize again.Position it in your flower cluster.Merge the 3 flowers and drag the layer just below your frame layers,activate one of the frame layers and grab your magic wand again and click outside the frame and activate the flower layer again, hit delete on your keyboard.select none and duplicate the flower layer, mirror and flip.position as desired.I also added button 2 under the flower clusters to add more color.
8.Open the branch 3 resize it as the other elements and paste it as a new layer on top of the paper layer. Use the freehand selection tool to select the part of the branch you want on top of the frame. While it is selected right click on the branch layer on your layer pallette. Promote selection to layer.Now make the branch layer active again and hit delete on your keyboard. Select none and drag the promoted selection above the frame layers.
9. Add any elements you wish,
Add a drop shadow to each.
10.Paste your tube layer and add your © info now.

11.Grab your text tool and type a quote of your choice
I typed "I see your true colors, and thats why I love you"
But I used the love word art instead of the word love."
Use a couple of fonts to really make the text
stand out.
12. Add your favorite text effects now.
13. Type your name in a different font and add the text effects you want
I only did a drop shadow on the name.
14.Add a new layer and arrange it to the top of the layer pallette.Select all, go to selections and contract the selection by 10. Invert the selection.Fill the selection with a color from the tag.Select none.
Save it as a png.

Thanks for trying my tut!
I hope your happy with your results!
Hugs from Kel

Thursday, November 12, 2009

PS...

This tutorial was written by Kelli on 11/12/09.
Do not copy this tutorial or post through any kind of group or claim it as your own.
Resemblance to any other tutorial is strictly coincidental.
This tutorial was written using psp 9, but should work using any version. It is written assuming you have a basic knowledge of PSP and its tools.
Supplies Needed:
~ The Scrap kit By
TaggingAngelsNScraps
called "My Love "
it Can be purchased
HERE
you can check out her blog
HERE
~A tube of choice.I used a tube by
Keith Grvey. You need a license to use his work
You can purchase one at MPT
~Font of choice
~Mask of choice or the one in the supplies.
If this is your mask please email me @purplehearts@live.com
And I will give credit or take it down
Ok......Ready?
1. Open a new image 500 x 500 pixels.
Add a new layer and go to selections, select all.
2.Open a paper of choice and resize it to 700 wide.Copy it and paste it into selection on your working image.
3.Open another paper ad repeat step 2. Select none. You should have 2 paper layers on your working image now.
4.put the mask in your masks folder, make the bottom paper layer acive and load your mask
merge group, repeat on the next paper layer. resize the top paper laer twice x 75%. Merge down.
5.Open one of the fancy trims from the kit
paste it as a new layer and position it at the bottom of the heart mask layer.
6.Now open one of the frames from the kit and paste it on top of the trim layer.When you have it positioned as you like, take your selection tool set to rectangle and select the part of the ribbon that is going to be threaded through the frame layer, refer to my tag for clarification.
7.Now dont deselect yet, go to your layer pallette.and on the trim layer, right click on it and promote selection to layer.
Now go back to the trim layer and hit delete on your keyboard.Go back to the promoted selection layer and drag that layer above the frame layer.
now it should look like it is threaded through the frame.
8.add your tube of choice, position it below your trim and frame layer, add a drop shadow, now add your copywright.
9. Add any elements you wish,
Add a drop shadow to each.
10.Add your name and your favorite text effects.
Save it as a png
Thanks for trying my tut!
Hugs from Kel

Wednesday, November 11, 2009

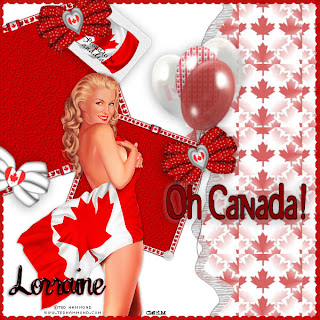
Oh Canada!

This tutorial was written by Kelli on 11/11/09.
Do not copy this tutorial or post through any kind of group or claim it as your own.
Resemblance to any other tutorial is strictly coincidental.
This tutorial was written using psp 9, but should work using any version. It is written assuming you have a basic knowledge of PSP and its tools. Supplies Needed:
~ The Scrap kit By Artlor Designs
called "Proud Canadian"
it Can be purchased
HERE
you can check out her blog HERE
~A tube of choice.I used a tube by Ted Hammond
You need a license to use his work.You can get one at CILM
~2 Fonts of choice

Ok......Ready?
1. Open a new image 600 x 600 pixels.
Add a new layer and go to selections, select all.
2.Open a paper of choice and resize it to 600x600.Copy it and paste it into selection on your working image.
3.Open the frame from the kit, crop the excess canvas away and resize it to 900 pixels at its largest side, Now reize it again, this time, make it 35%.Copy and paste it as a new layer, Rotate it x 20 degrees to the left.
4.duplicate it and resize the duplicate x 75%
Mirror it, position both of the frames as desired, sharpen both of them and add a drop shadow of choice.
5.Open one of the lace ribbons,
crop away the excess canvas and resize it to 600 pixels wide. Copy it and paste it as a new layer,
Position it at the top of the image,
so only the lower scallops are visible, duplicate it an flip, position them both as desired,when hapy with the placement, merge down, duplicate and rotate x 90. merge down ao you have the 4 sides on one layer, duplicate it and merge down again.
6.Make one of the frame layers the active layer, grab your magic wand an cick inside it, expand the selection x 2, open another paper, resize it to 600 pixels, copy and paste it into selection, repeat on the other frame. Select none.
7.Paste your tube as a new layer, position as desired,
add a drop shadow.Add the copywright info.
8.add the elements of choice,
add a drop shadow to each of them.
9.Grab your text tool and type the text of choice, I tyed"Oh Canada"
Add your favorite text effects.
10. Choose another font and type your name and add your favorite text effects.
11. Save it as a jpeg.
Thanks for trying my tut!
Hugs from Kel

The other Heart

This tutorial was written by Kelli on 11/11/09.
Do not copy this tutorial or post through any kind of group or claim it as your own.
Resemblance to any other tutorial is strictly coincidental.
This tutorial was written using psp 9, but should work using any version. It is written assuming you have a basic knowledge of PSP and its tools. Supplies Needed:
~ The Scrap kit By CaysCreation Designs
called "Romance"
it Can be purchased HERE or HERE
you can check out her blog HERE
~A tube of choice.I used these cute little posers HERE
~Font of choice
Ok......Ready?
1. Open a new image 700 x 250 pixels.
Add a new layer ad go to selections, select all.
2.Open a paper of choice and resize it to 700 wide.Copy it and paste it into selection on your working image.
3.Open element 031, Resze it x 35% you will need resize it a couple of times to make it the right size.paste it as a new layer,
Rotate it to the left x 20 degrees.
4.Position it as desired and add a drop shadow of choice.p shadow of choice. Add your copywright.
5.Open the row of hearts element and resize it to 250 pixels high. Position it on one side of the tag,add a drop shadow. Duplicate it and mirror.So you have the little hearts on both sides of your tag.
6.Open the other elements you are going to use.Resize them and copy and paste them.
Position them as desired and add a drop shadow to each.
7.Grab your text tool and select a typewriter font, Or whatever you wish, and type your text for the notebook paper,
I typed:
God gave us 2 ears to hear, 2 eyes to see and 2 hands to hold, but why did he give us only 1 heart?Because he wanted us to find the other one.
When you are hapy with the size, rotate it to the left x 20
or use the same settings you used for the paper element,You want it to look like it been written on the lines.
8.add your tube of choice, position it as desired, add a drop shaow, now add your copywright.
9. Choose another font and type your name and add your favorite text effects.
10.Add your name and your favorite text effects.
Save it as a jpeg.
Thanks for trying my tut!
Hugs from Kel

to be Loved

This tutorial was written by Kelli on 11/11/09.
Do not copy this tutorial or post through any kind of group or
claim it as your own.
Resemblance to any other tutorial is strictly coincidental.
This tutorial was written using psp 9, but should work using any version. It is written assuming you have a basic knowledge of PSP and its tools. Supplies Needed:
~ The Scrap kit By CaysCreation Designs called "Romance"
it Can be purchased
HERE or HERE
you can check out her blog
HERE
~A tube of choice.I used these cute little posers
HERE
~Font of choice

Ok......Ready?

1. Open a new image 500x 500.
2.Open a paper of choice and resize it to 500 tall.Copy and paste it as a new layer onto your frame image.
3.Open element 057, Resze it to 500 pixels high.Copy and paste it
onto your working image.Add a drop shadow of coice.
4.Add your tube of choice,Resize it as needed and add a drop shadow of choice. Add your copywright.
5.Duplicate the tube
and on the original tube go to effects,
texture effects and apply Mosaic Antique with the default settings.
6.If you want to add more elements than I did, now is the time to do it.
lol.
7.Now add a border, 2 pixels ,make it a dark color, add another border 10 pixels, and make it a light color, add another 2 pixel border the same color as the first border.
8.Grab your magic wand, click inside the 10 pixel border, Go to effects, reflection efects,
pattern and use the default settings. Select none.
9. Open the rose from the kit and resize it as desired,
Position it and add a drop shadow as before,Duplicate it and position it
as desired, duplicate it again, and position it as desired.
10. Open the Love Word art and resize it,Copy and paste it onto your working tag, Grab your text tool and type your quote of choice.
11.Add your name and your favorite text effects.
Save it as a jpeg.
Thanks for trying my tut!
Hugs from Kel

Sunday, November 8, 2009

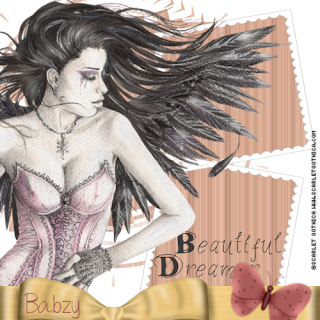
Beautiful Dreamer


This tutorial was written by Kelli on 11/08/09.
Do not copy this tutorial or post through any kind of group
or claim it as your own.
Resemblance to any other tutorial is strictly coincidental.
This tutorial was written using psp 9,
but should work using any version.
It is written assuming you have a basic knowledge
of PSP and its tools. Supplies Needed: ~ The Scrap kit By Babzy's boutique
called "Golden Bown"
it Can be purchased
HERE
you can check out her blog
HERE
~a tube of choice
~Font of choice
~A mask of choice

Ok......Ready?
1. Open the scalloped frame from the kit,resize it to 30x300 pixels .
2. Open a new transparent image, 500x500.
Past your resized frame as a new image,Rotate it x 10 to the right.Position it in the top right hand corner,
Duplicate it and mirror it.
Now positin the two frames one on top of the other.
Refer to my tag if desired, or position them in your own way.
Once you have them as desired,
open a paper of choice, or use a pattern of choice.
Copy it.Go back to your working image, grab
your magic wand and click inside one of the frames,
add a new raster layer below the frame layer,
paste into selection.
Select none. Duplicate your paper layer,
mirror and position it inside the other frame layer.
Copy and paste it as a new image. Close the original.
3.Open one of the ribbons and resize it to 500 pixels wide.
4.Open your tube. copy and paste it onto your paper tht you cropped, a large tube will work best.Merge visible and go to effects, image effects, offset set the vertival at 0and the horizontal as far to the right as it will go.so you have a nice striped pattern.
5.Open one of the butterflies, resize as desired, paste it onto
your working canvas, add a drop shadow of choice.
6.Now paste your tube onto your working image arrange it just above your frame layer, add a drop shadow of choice.Add your copywright info now.
7.Now grab Your text tool and type your text
along with whatever text effects you like.
8.Use a different font to type your name and add your favorite text effects to it.osition it as desred
9. Open another paper and resize it to 500 pixels,
copy and paste it onto your working image as a new laywe,
drag it to the botttom of your layer pallete,
apply your mask and merge group
Position the mask in the left upper corner.
10. When happy with everything save it as a png.

Thanks for trying my tut
Hugs from Kel

Beautiful

This tutorial was written by Kelli on 11/08/09.
Do not copy this tutorial or post through any kind of group
or claim it as your own.
Resemblance to any other tutorial is strictly coincidental.
This tutorial was written using psp 9,
but should work using any version.
It is written assuming you have a basic knowledge
of PSP and its tools.
Supplies Needed: ~ The Scrap kit By Babzy's boutique
called "Golden Bown"
it Can be purchased HERE
you can check out her blog HERE
~a tube of choice
~Font of choice
~my word art (Here) or one of choice

Ok......Ready?
1. Open the frame from the kit,resize it to 500 pixels x 500 pixels.Copy and paste it as a new image. Close the original. 2.Open a paper of choice and grab your crop tool, crop the paper to 500 x 500 pixels.Copy and paste it as a new layer, onto your working image.Drag it below the frame layer.
3.Open your tube. copy and paste it onto your paper tht you cropped, a large tube will work best.Merge visible and go to effects, image effects, offset set the vertival at 0and the horizontal as far to the right as it will go.so you have a nice striped pattern.
4.Copy the striped patern you just made.go back to your working image and activate the frame layer, make a new layer below your frame layer.grab your magic wand tool and click inside the frame.Expand your selection x 3 and paste into your new layer.Select none.
5.Now paste your tube onto your working image arrange it just above your frame layer, add a drop shadow of choice.Add our copywright info now.
7.Add your word art now.
8.Grab your text tool and type your name in your favorite font now, and add your faorite text effects,I just added a drop shadow.
9. Save it as a jpeg
Thanks for trying my tut!
Hugs from Kel

Saturday, November 7, 2009

Give Thanks

This tutorial was written by Kelli on 11/07/09.
Do not copy this tutorial or post through any kind of group or
claim it as your own.
Resemblance to any other tutorial is strictly coincidental.
This tutorial was written using psp 9, but should work using any version. It is written assuming you have a basic knowledge of PSP and its tools.

Supplies Needed:
~ The Scrap kit By Staceys Designs called "Give Thanks "
it Can be purchased HERE or HERE
you can check out her blog HERE
~2 or 4 tubes of choice.I just used the clip art from the kit
~Font of choice

Ok......Ready?
1. Open the quad frame,Shif + D to dulicate it, close the original.Resize the frame image to 500 pixels tall.
2.Open a paper of choice and resize it to 500 tall.Copy and paste it as a new layer onto your frame image.
3.Grab your magic wand and click outside of the frame on all sides, so that all of the excess canvas on the frame layer is selected.Go to selections, expand by 6,now acivate the paper layer and hit delete on your keyboard to get rid of the paper outside of the frame.
4.Now activate your magic wand tool,nd click inside one of the frames,expand the selection x 5 Paste one of our tubes below the frame layer, go to selections and invert the selection.now hit delete on your keyboard.Repeat with the other frames.
5.Open the leaves png, copy and paste it onto your working image, drag it to the bottom, resize as desired, Move it to one side, Now duplicate it,flip and mirror the duplicate.Position it in the opposite corner of your image. 6.Open the give thanks pendant, reize it to an approprite size, copy and paste it onto your working image, position it in the middle of your image. Add a drop shadow of choice.
7.Grab your text tol and type your name, move it to the center of the pendant.
8.When happy with everything, save it as a png.

Thanks for trying my tut!
Hugs from Kel

Friday, November 6, 2009

quickpage


This tutorial was written by Kelli on 11/07/09. Do not copy this tutorial or post through any kind of group or claim it as your own. Resemblance to any other tutorial is strictly coincidental. This tutorial was written using psp 9, but should work using any version. It is written assuming you have a basic knowledge of PSP and its tools.

Supplies Needed:

~ The Scrap kit By Staceys Designs called "Tranquility" it Can be purchased HERE or HERE
you can check out her blog HERE
~3 Images of choice.I used 3 of my daughters pictures
~Fonts of choice

Ok......Ready?

1. Open one of the papers from the kit,resize it to 700 x700 pixels.
2.Open the braided ribbon from the kit resize it to 300 pixels wide.
Copy and paste it onto your working image.
Duplicate it and rotate the duplicated to the left x 90 degrees.
Position it so that it makes a corner.Merge down and duplicate again.Mirror and flip the dulicated so you have a frame.
Merge down and duplicate your frame twice. So you have 3,
Duplicate as many times as you like, its your quick page
lol
3.Rotate one of the frames left x 20.
leave one of them alone and rotate the last one to the right x 20.
Position as desired, refer to my image for placement.
4.Rotate one of them to the left by 20 and another one to the right by 20.
the other one stays as it is.
5.Open one of the doodles onto your working image, resize as desired.Change the blend mode to luminance.
6.Grab your maic wand and click inside one of the frames. Expand the selection by 3.
Add a new layer under your frame layer and paste into selection.
Do not deselect yet.
Add another new layer and paste another one of your images into selection.Add another new layer and paste your third image into selection.Now you can deselect.
7.Rotate one of the images to the left x 20 and one of them to the right x 20.Leave the third one as it is.Position them into your frames.
8.Add your text and your favorite text effects.
9.Add the other elements you are going to add to your quickpage. Add a drop shadow of choice.
Save as a jpeg,

Thanks for trying my tut!

Hugs from Kel

Thursday, November 5, 2009

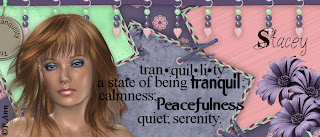
Tranquility

This tutorial was written by Kelli on 11/05/09.
Do not copy this tutorial or post through any kind of group or claim it as your own.
Resemblance to any other tutorial is strictly coincidental.
This tutorial was written using psp 9, but should work using any version. It is written assuming you have a asic knowledge of
PSP and its tools.
Supplies Needed: ~ The Scrap kit By Staceys Designs
called "Tranquility"
it Can be purchased HERE or HERE
you can check out her blog HERE
~a close up Tube of choice.I have included seeral in my supplies.
If you use the please abide by her tou which is icluded in the zip HERE
I used A free tube by a wonderful artist Patty Ann.
If you would like to see more of her work you can visit
Escape from Reality
~My supplies HERE
~a Font of choice
Ok......Ready?
1. Open a new canvas, 700 pixels wide x 30 tall.Transparent.
2.Open a paper of choice, paste it as a new layer onto your new canvas.
3.Now open 3 more papers of choice,Resize them to 300 tall.Open the braid from the kit and resize it to 300 pixels wide.Pasted it onto
your resize paper, duplicate it 3 times and frame your paper with the braids. Repeat on the other 2 papers.
Copy and paste them onto your woring image.
4.Rotate one of them to the left by 25 and anothe one to the right by 25.
the other one stays as it is.Position the papes as desired.Refer to my tag for placement.
5.Add the elements of choice, add a drop shadow to each.
6.Paste your tube of choice as a new layer and dont forget your copywright.If your using the tubes I supplied, please use (C)P.Ann.
7. Now add the text or my word art from the zip.
8.Add your name and your favorite text effects.
Save as a jpeg,

Thanks for trying my tut!
Hugs from Kel

every creature


This tutorial was written by Kelli on 11/05/09. Do not copy this tutorial or post through any kind of group or claim it as your own.
Resemblance to any other tutorial is strictly coincidental.
This tutorial was written using psp 9,
but should work using any version.
It is written assuming you have a
asic knowledge of PSP and its tools.

Supplies Needed:
~ The Scrap kit By
Crystals Cottage Scraps called
"Indian Treasures Tagger"
it Can be purchased HERE
you can check out her blog HERE
~aTube of choice.
I used A free tube by a wonderful artist SLY.
If you would like to see more of her work you can visit
Escape from Reality
~My supplies (Template) HERE~2 Fonts of choice
~Eyecandy 4000 Grad Glow (Optional)
~Penta color Dot(Optional)

Ok......Ready?


1. Open My template and delete the top layer with my info on it. 2.Starting on the bottom frame layer, go to layers, and select all select float and then defloat the selection.Now open a paper of choice, resize it to 500 pixels, copy it, go back to your working image and paste into selection.

3.Repeate step 2 on the rest of the layers of the template.

4.fill the outlines with a color that matches the paper you are using for that layer,I also added a blue grd glow on the outlines.

5.Add a new raster layer and drag it to the bottom of your layers palletteFill it with a gradient of your choice.I chose landscape and inverted it so the sky is at the topDuplicate this layer, add a texture effect to the duplicated layer, I also did this step on the small rectangles layer.I use Penta color dot with the default settings.

6.When you have all the template layers filled, copy and paste the rest of the elements you are going to use on your tag,Paste your tube and add your copywright.

7.Grab your text tool and find your font.Type your name in the font of choice, before converting to raster layer,go to objects convert text to curves, as character shapes.Now over on your layrs pallete, click the + beside the vector layer, and arrangeour name as desired.When happy with it convert to raster an aply a grad glow.

8. Choose another fnt and type your saying of choice.I googled the lyrics to the colors of the wind fro mPocohontuslol.Add your favorite text effects.

9.When happy with everything, save it as a jpeg.

Thanks for trying my tut! Hugs from Kel

Monday, November 2, 2009

Life & Love


This tutorial was written by Kelli on 11/02/09.
Do not copy this tutorial or post through any kind of group or claim it as your own.
Resemblance to any other tutorial is strictly coincidental.
This tutorial was written using psp 9, but should work using any version. It is written assuming you have a basic knowledge of PSP and its tools.
Supplies Needed:
~ The Scrap kit By Pspgirl called "Love&Passion "
it Can be purchased HERE
you can check out her blog HERE
~Tube of choice.I used A free tube by a wonderful artist
Patty Ann.If you would like to see more of her work you can visit
~My supplies (Word art and Template) HERE
~a Font of choice
Ok......Ready?
1. Open My template and delete the top layer with my info on it. 2.Starting on the bottom frame layer, go to layers, and select all select float and then defloat the selection.Now open a paper of choice, resize it to 500 pixels, copy it, go back to your working image and paste into selection.
3.Repeate step 2 on the rest of the layers of the template.
4.I deleted the circle layer on my template and used the beautiful circle frame from he kit.
5.Make the frames layer active, grab your magic wand and click inside both frames, expand the selecton x 5 paste a light colored paper into selection, select none.Now go to adjust, and sharpen all your paper layers.
5.When you have all the template layers filled, copy and paste the rest of the elements you are going to use on your tag,Paste your tube and add your copywright.
6.Open my word art, and the flower you are going to use with it.Resize the flower to an appropriate size to fit inside the word art.When happy with it, copy and paste it as a new layer, position it inside one of the small frames.
7. Choose your text tool, and add your name in you choice of font, add your favorite text effects.
8.When happy with everything, save it as a png.

Thanks for trying my tut!
Hugs from Kel

Love & Chocolate


This tutorial was written by Kelli on 11/01/09.
Do not copy this tutorial or post through any kind of group or claim it as your own.
Resemblance to any other tutorial is strictly coincidental.
This tutorial was written using psp 9, but should work using any version.
It is written assuming you have a basic knowledge of PSP and its tools.
Supplies Needed: ~ The Scrap kit By Pspgirl called "Love&Passion "
it Can be purchased HERE
you can check out her blog HERE
~Tube of choice...I used A tube by Keith Garvey.
You must purchase a license to use his work.
You can get one at MPT
~2 Fonts of choice
~eyecandy grad glow
~Mask of choice or this one:
(I m sorry I dont know where I got this mask,
If it is yours please let me know
and I will give credit or take it down)
Ok......Ready?
1. Open a new image 700 pixels wide x 320 pixels high.
2.Open frame of choice, Resize it as needed, Paste it onto your working image,rotate it by 25 degrees to the left.Resize it to fit nicely into your tag.When it is the right size duplicate it and mirror the duplicate.Duplicate again, rotate it as above,position all three frames, refer to my tag for placement.
3.Grab your magic wand tool and click inside the middle frame.Modify the selection by expanding the selection x 20 pixels, add a new layer below the frame layer and paste a paper of choice into selection,(I resized the paper to 500 pixels before coying it).Select none.Duplicate the layer,rotate it as above.Position it under the left frame,Duplicate it and mirror it, now you should have a paper under each of the frames.Merge the frame and paper layers so you dont have so may layers.
4.Now open another paper of choice, resize it to 300 pixels, Open your mask of choice, or the one I have provided.Apply your mask to the paper you just opened.Merge group.Copy and paste it onto your working image.Position it in one corner,Duplcate it and mirror the duplicate.Now duplicate again and position the new dulicated layer in the middle of the tag.Grab your deform tool and rotate it to the left until it looks straight.Refer to my tag if needed.
5.Merge the three mask layers, when they are positioned as desired.
6.Open the element75.Resize it x 75%.Copy and paste it onto your working image.Drag it above the mask layer,and just below your frame layer. Add the candy bar on top of your frame layer, use your deform tool to rotate it.Paste your tube of choice.And add Copywright.
7.Open the other elements you are going to use on your tag.Resize them, and paste them onto your ta.
Add a drop shadow to each element, Scatter the Chocolate chips around your tag.
8. Choose your text tool, and one of the fonts you are going to use. Type your text, I did "All I really need is love but a little chocolate now and then doesnt hurt",Convert to Raster layer and add a white grad glow.Repeat the grad glow with a brown from the chocolate.I also added a white grad glow to the copywright layer.
9.Now choose your other font and type your name.Add the same grad glow you used for the prevous text.
10.When happy with everything, save it as a jpeg.
Thanks for trying my tut!
Hugs from Kel

Saturday, October 31, 2009

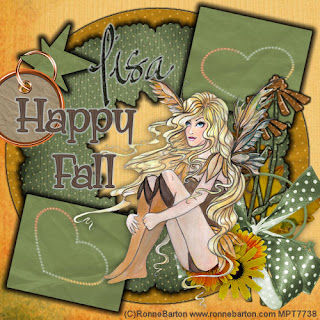
Fall Fairy


This tutorial was written by Kelli on 10/31/09.
Do not copy this tutorial or post through any kind of group or claim it as your own.
Resemblance to any other tutorial is strictly coincidental.
This tutorial was written using psp 9, but should work using any version.
It is written assuming you have a basic knowledge of PSP and its tools.
Supplies Needed:
~ The Scrap kit By Country Girl Creations
called "Fall Frenzy"
it Can be purchased
HERE
~Tube of choice...I used A tube by Ronne Barton.You must purchase a license to use his work.You can get one at MPT
~2 Fonts of choice
~Cadi's tag template
HERE


Ok......Ready?


1. Open Cadi's template.Delete the copwright layer.

2.MakeThe Background layer active Select all , Fill with a paper of choice.I resized the paper I wanted to use to 500 pixels, and pasted into selection)

3.Repeat this for the rest of the layers.

4.Add a Grad glow, black to all the layers of the template.

5.Open the tag 01,
Resize it by 85% and paste it onto your working image.
Position it on your star.Now grab your eraser tool, and erase some of he tag you just pasted, so that it looks like its hanging on the star.

5.Open the elements you are going to use on your tag.
Resize them by 85%. Paste them onto your tag and position as desired.Add a drop shadow to each of them.

6.Paste your tube of choice as a new layer, add a drop shadow to it, add your copywright.

7. Choose your text tool, and one of the fonts you are going to use.
Type your text, I did "Happy Fall",Convert to Raster layer and add a light colored grad glow.

9.Now choose your other font and type your name.Add an inner bevel of choice, now add the default settings for eye candy glass.Add the same grad glow you used for the prevous text.

10.When happy with everything, save it as a jpeg.

Thanks for trying my tut!

Hugs from Kel

Sunday, October 25, 2009

American Beauty


This tutorial was written by Kelli on 10/25/09.Do not copy this tutorial or post through any kind of group or claim it as your own.Resemblance to any other tutorial is strictly coincidental.This tutorial was written using psp 9, but should work using any version.It is written assuming you have a basic knowledge of PSP and its tools.

Supplies Needed:
~ The Scrap kit By Ms. Witchypoo Designs
Called StarsnStripes
it Can be purchased HERE
you can check out her blog HERE
~Tube of choice
I used A tube by Keith Garvey.
You must purchase a license to use his work.You can get one at MPT
~2 Fonts of choice
~eye Candy 4000 Grad glow(optional)

Ok......Ready?

1. Open the paper of choice.Resize it to 500 pixels.Copy and passte it as a new image.Close the original.
2.Open one of the brads, I chose the red one.Resize it to 500 pixels.Copy it and paste it as a new layer.
3.Open element6.Resize, and copy and paste it ontop of the brad.
4.Open element 1resize it and paste it as a new layer.Grab your magic wand tool, and click inside one of the frameson the layer you just pasted. Open one of the papers, resize it to 300 pixels, copy it.Go back to your new tag Make a new raster layer and paste into selection.Select none. Duplicate it three timesMove it the duplicated layers to the rest of the frames.They should be under the red frame layer.I used 2 different papers. 5.Open ele 3 (the flag.)Resize it and copy and paste it. You want it to be really small.Rotate it to the left by 40 degrees.
6.Now open he yellow support ribbon or one of the other ribbons.resize it and copy and past it onto your tag image,position it in the bottom corner of your flag element.
. Now open the red rose, the babies breath and the leeaf, resize all od them to the desired size.I resized all of them to 50 pixels and then resized them again x 75%.Paste them onto your tsg, you may have to resize more,position them how you wwant them to look together,merge them together, duplicate the merged layer, resize it x 85 degrees.Duplicae again and resize again.Position all three layers how you want them and merge them again.So you can position them as one layer. 8.Grab your preset shapes tool, background null,dorsnt matter what color you have as the foreground color.Draw a circle as big as the brad. 9.Dont convert it, grab your text tool, find your chosen scripty font andhover your mouse over the new elipse until you geet the little A icon with the little half circle under it,Type "American Beauty",you may have to add some spaces in front of the text to get the tex where you want it.When it is positioned in the spot you want it go to your layer pallete, click the + sign beside the vector layer, hide the elipse layer, then convert it to a raster layer,Apply your favorite text effects, I did a grad glow,but if you dont have eye candy you can just add a drop shadow.
10.Paste your tube as a new layer, apply a drop shadow of choice, dont forget your copywright.
11.Now select your text tool again and type your name with a different font.Add the same text effects from before.
12.Open the red and blue hearts, resize them, copy and paste them onto your tag.Merge them together,Position them as desired.
13.Save as a jpeg.


Thanks for trying my tut!Hugs from Kel

Saturday, October 24, 2009

Angel Sent


This tutorial was written by Kelli on 10/24/09.

Do not copy this tutorial or post through any kind of group or claim it as your own.

Resemblance to any other tutorial is strictly coincidental.

This tutorial was written using psp 9, but should work using any version.

It is written assuming you have a basic knowledge of PSP and its tools.

Supplies Needed:
~ The Scrap kit By Staceys Designs
Called Precious Baby Girl it Can be purchased HERE or HERE
you can check out her blog HERE
~Tube of choice...I used A tube by Elias Chatzoudis.You must purchase a license to use his work.You can get one at MPT
~Font of choice
~Cadi's tag template HERE

Ok......Ready?

1. Open Cadi's template.Resize it to 500 wide.Delete the copwright layer.

2.Make picture 1 activeelect all float, float the selection, defloat the selection and then fill it with color or paer of choice.I chose a color from the color pallette that is included in the kit.

3.Repeat for the other 3 pictures.

4.Repeat with the circle I filled it with paper6.Add a heavy drop shadow to the pictures and circle. 5.Color the hearts in the same way, add eyecandy glass with the default settings, changing the color to the same color of your hearts.If desired add a drop shadow.

6.Grab your magic wand.Make the rectangle layer the active layer, click inside he outline part of your rectangle.Fill it with a color of choice and add the same glass as before.now Select none, and with your magic wand select the inside of the rectaangle,fill it with a paper or color of choice,I used paper4.

7. Paste your tube of choice as a new layer,position the tube so it is laying on top of the rectangle.Add your copywright. 8.Open the love ribbon, resize it x 75 % 4 times. Copy it and paste it onto your tag position it as desired, refer to my tag if needed. 9.Open the bow ribbon, resize it and paste it as a new layer, poaition it as desired and add the same drop shadow.

10.Open the word art with onsie, with your free hand selection tool.Select the wording only. Copy and paste it onto your tag.Position it inside the rectangle.Add a grad glow.

11.add any more elements you wish.

12.Add your name in a scripty font of choice.Add your favorite text effects.

13.Hide the background layer and save as a png.

Thanks for trying my tut!Hugs from Kel

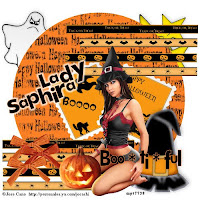
Bootiful


This tutorial was written by Kelli on 10/24/09.
Do not copy this tutorial or post through any kind of group

or claim it as your own.
Resemblance to any other tutorial is strictly coincidental.
This tutorial was written using psp 9, but should work using any version.
It is written assuming you have a basic knowledge of PSP and its tools.
Supplies Needed:
~ The Scrap kit By
LadySaphira Called Trick or Treat
it Can be purchased
HERE
you can check out her blog HERE

~Tube of choice...I used A tube by Jose Cano.
You must purchase a license to use his work.
You can get one at
MPT
~Font of choice


Ok......Ready?

1. Open a new transparent image 500 wide by 500.
2.Open paper of choice Shift + d to duplicate it close the original.

Copy it and paste it onto your workin tag.
3.Grab your preset shapes tool set to elipse.Stroke Null.Background doesnt matter. Draw a large circle in the mddle of the image.
4.Before converting to raster, go to objects, align, center in canvas.Then convert to raster,after its the size you want it.
5.Grab your magic wand, click inside your new circle.Now invert the selection,make your paper layer active, and hit delete on your keyboard.This will get rid of the paper thats outside of your circle.
6.Open the ribbons and resize them to an appropriate size for your tag.
Use as many or as few as you choose.
I wanted to use all 4 of them.
Dulicate them and flip and mirror them.
position as desired. Refer to my tag if desired.
7. Add elements of choice and add a drop shadow to each.
8.Paste your tube as a new layer, resize it as desired.Add a drop shadow of choice.Dont forget to add your copywright.
9.Grab your text tool and find your chosen font
I used 2 peas airplane.Type Boo*ti*ful, Add text effects of choice, I used eye candy 4 to make a small grad glow on the text.
10.Add your name wth the same effect.Rotate the name to the left by 25 degrees.
11.save it as a png.

Thanks for trying my tut!
Hugs from Kel